CoDesigner Badges Module works as a highlighter for your WooCommerce product. Not only this, you can add a discount amount a Badge image, and a Badge Icon with your WooCommerce Products.
How to Set Badge Module Feature in Products
The Badges Module is easy to use. To set the Badges for your products-
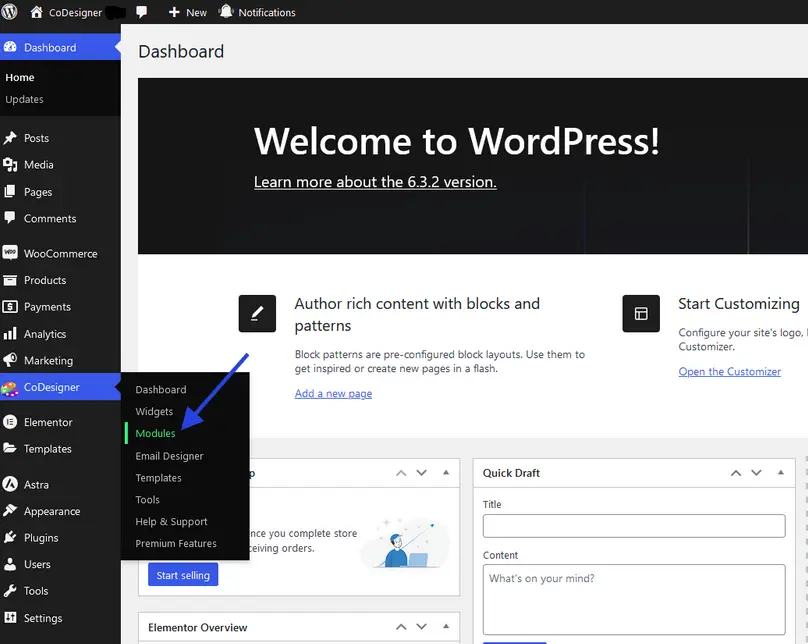
Step 1: First navigate to your site dashboard and click on the Module section within the CoDesigner menu.
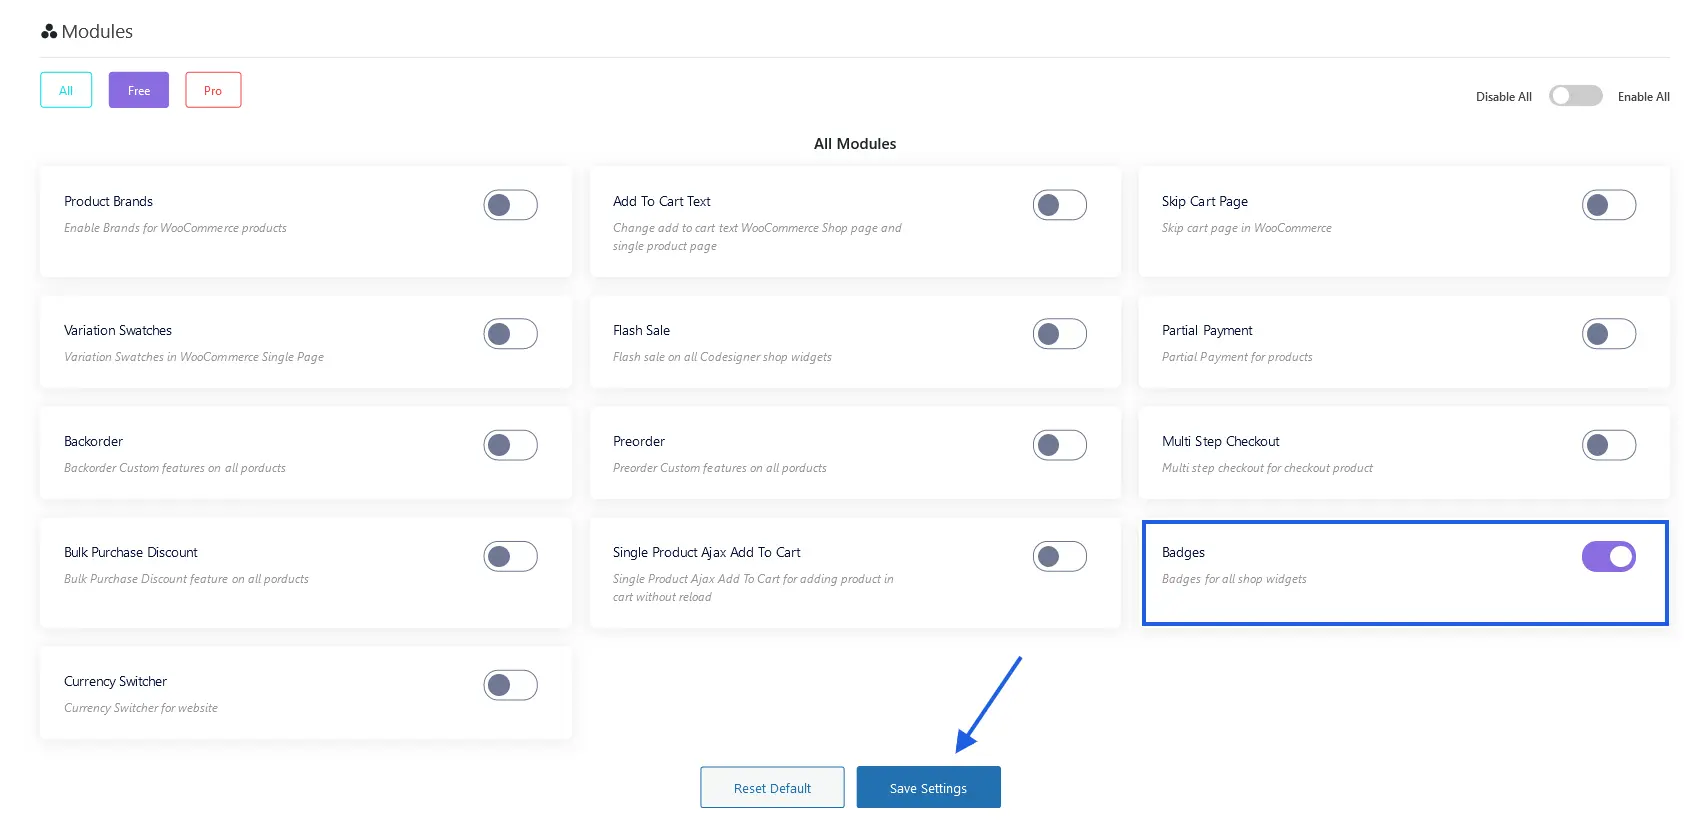
Step 2: On the Module page, you have to locate the Badges Module and enable it. After that, click on the Save Settings button.
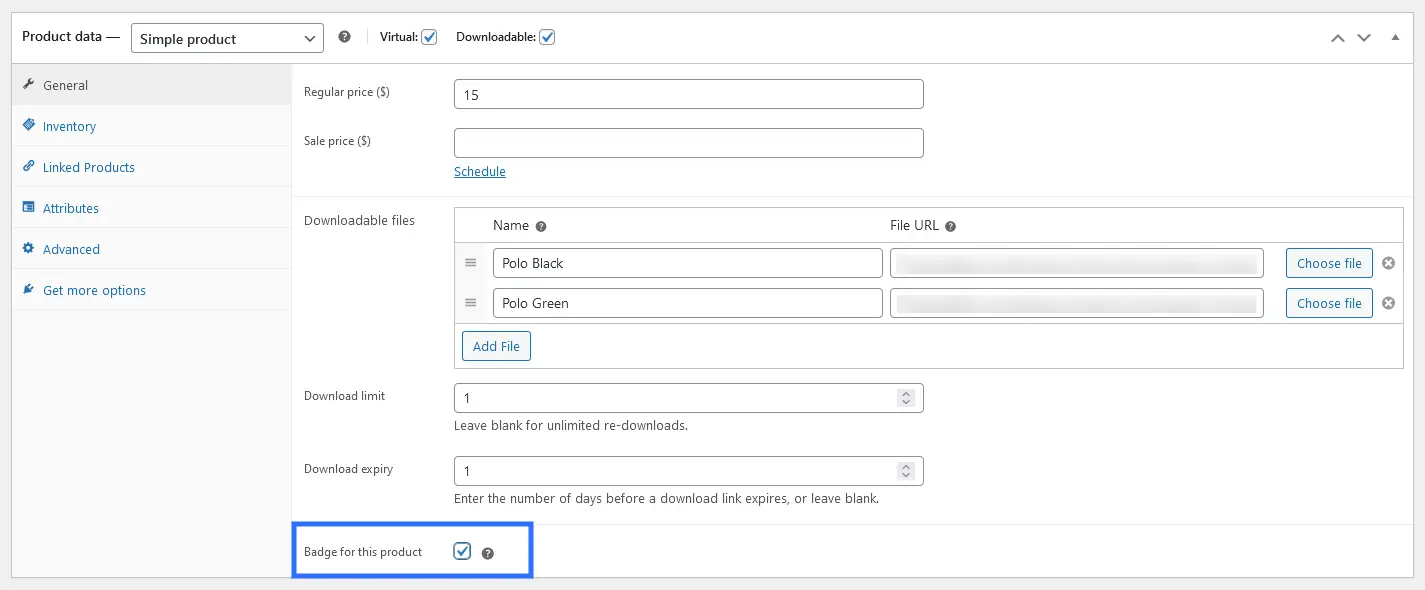
Step 3: Now you have to go to your product page. There you have to select the product for which you want to provide a badge. Open the selected product with the editor. From the product page data section, you have to enable the badges from there. When you’re done update this setting.
Step 4: Now open your shop widget with Elementor. You’ll discover a Badge setting from the editor. From there you can select the Badge as Image, Icon, and text. When your customization is done click on the Update button.
![]()