You can use the basic menu widget to create a header template with CoDesigner. Follow the steps to add the basic menu on the header.
1. To get started with CoDesigner, first go to the dashboard. From there, you can click on the “Elements” button.

Codesigner elements Section
2. The “Basic menu” widget is located in the Others section at the bottom of the page. Enable the widget and click the “Save Settings” button to apply the change.
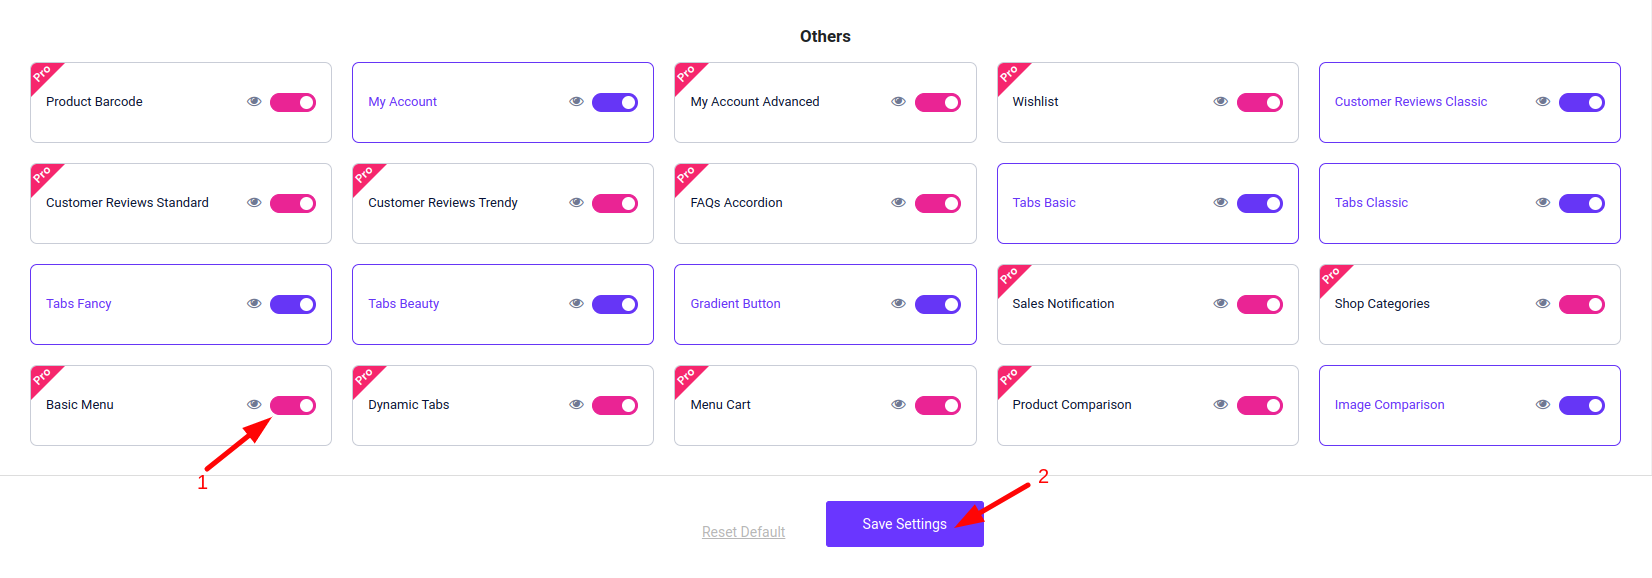
Codesigner others section
3. Now create a new header template with CoDesigner from the templates section if you don’t have a header created with CoDesigner yet. Select the “Add New” button.

Create Template
4. On the pop-up window select WCD Header, name the header template, and click Create Template button.
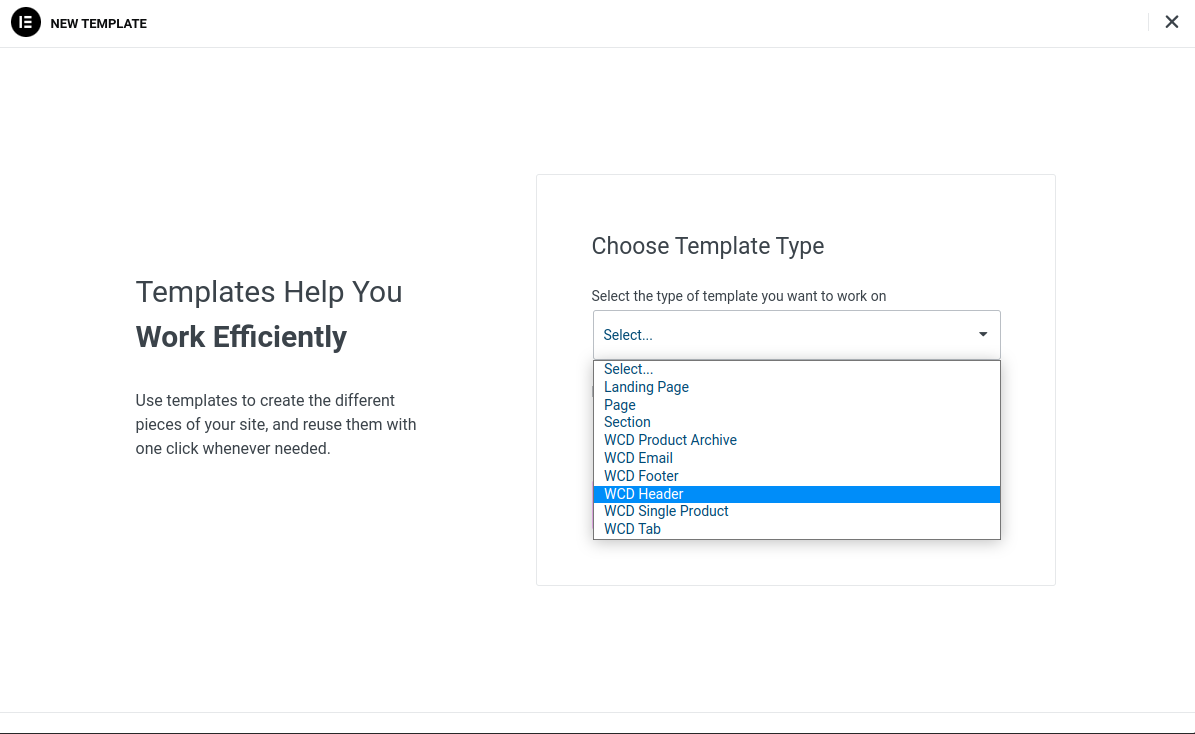
Choose Template Type
5. You will be redirected to an Elementor editor page. Here you can create 3 sections as we did. We added a logo, the basic menu, and the menu cart by CoDesigner in the header. To add the menu you need to search for “Basic Menu” in the Elements Search bar.

Basic Menu Widget
6. WCD Basic menu has the option to select a particular menu to display in the contents section. You can also change layouts, alignment, pointer, animation, sub-menu indicator, and mobile dropdown options in the content section.
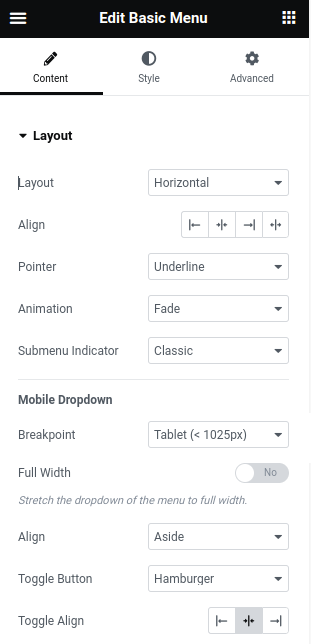
Edit Basic Menu Widget
You can also, style and customize the menu however you want using the Style and Advanced tab.
After making some basic changes and designing “The basic menu” widget by CoDesinger, this is how your new menu will look like. You can further make additional changes and extensive design to make the menu more appealing.

Basic Menu Widget