You can design PDF invoices in minutes using Handy Addons premade templates. One of the best things about these eye-catching templates is – you can customize the important parts of the PDF Invoices. All you need to do is follow the steps below –
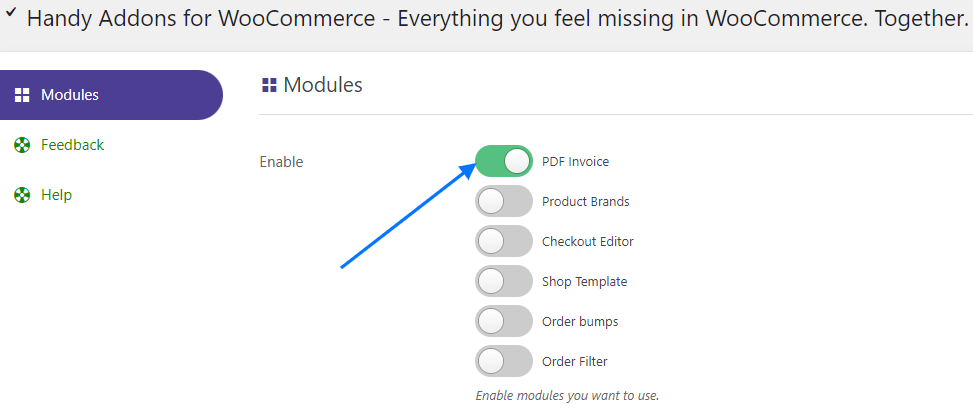
1. First, enable PDF Invoice from the Handy Addons dashboard and save the settings.
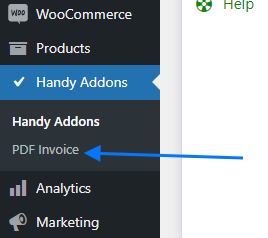
2. Go to PDF Invoice from the WordPress dashboard as shown in the screenshot below.
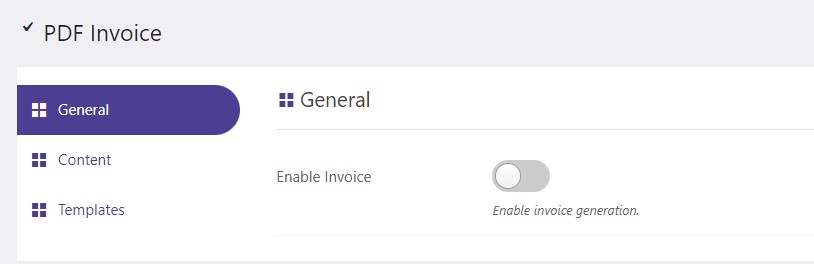
General Settings
3. On the General settings tab – Enable Invoice.
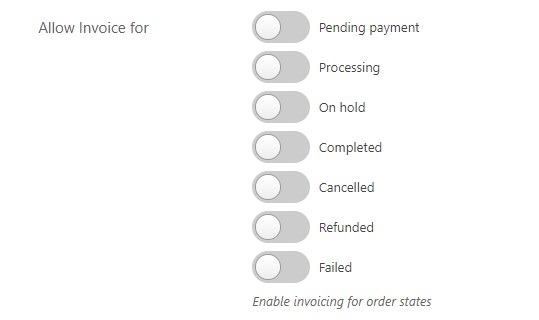
4. Options to Allow Invoice for order states – Pending Payment, Processing, On hold, Completed, Cancelled, Refunded, Failed should appear. You can enable all or only the ones you wish to send to your customer.
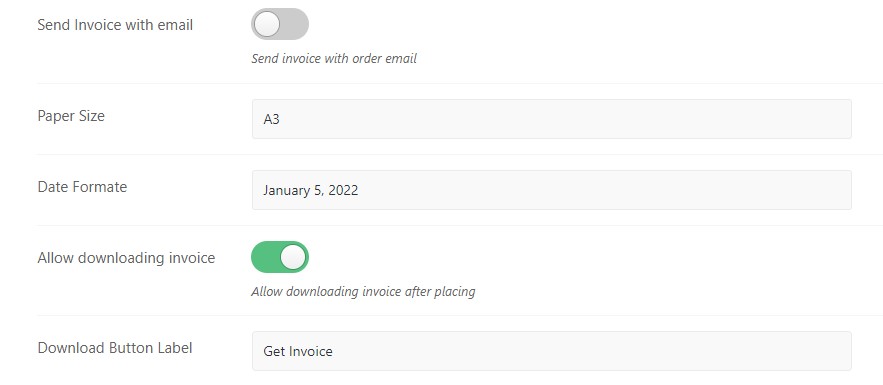
5. Also, you can enable Send Invoice with email, set Paper Size, Date Formate, Allow downloading invoice, and change the Download Button Label on the General settings.
Content Settings
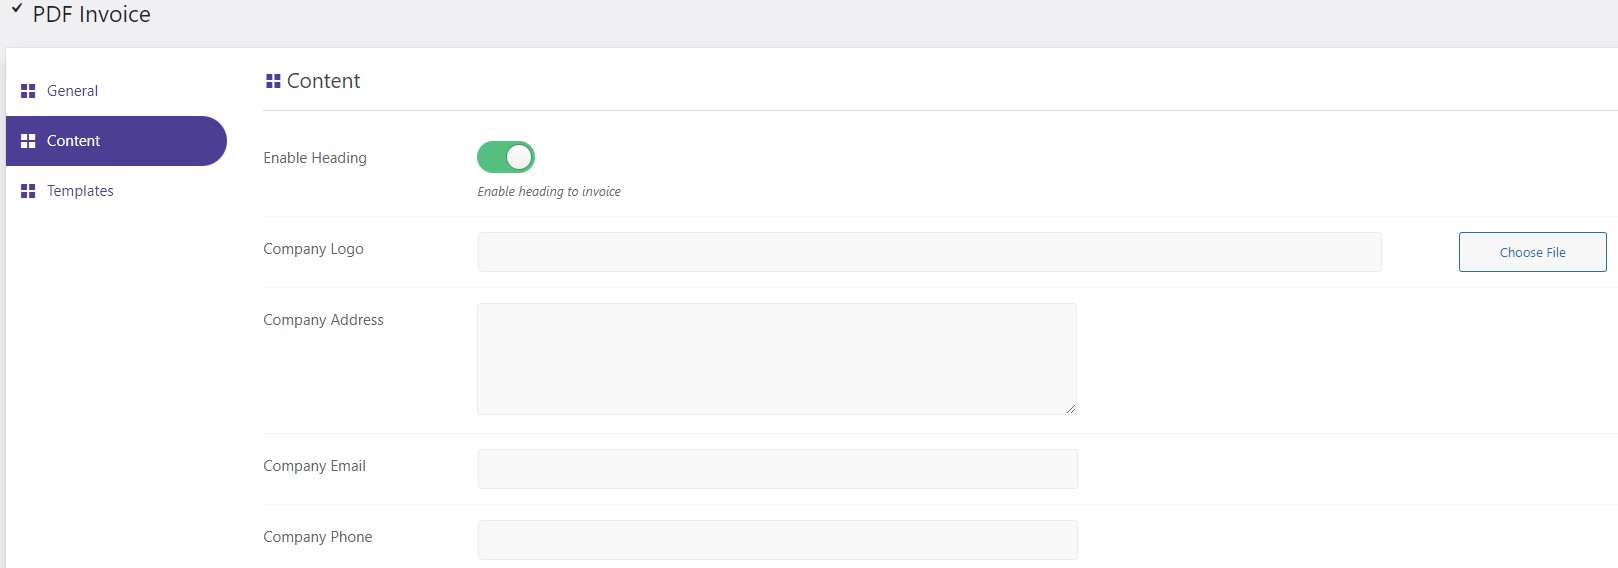
6. In the Content settings you can enable heading which allows you to set custom Company Logo, Company Address, Company Email, and Company Phone.
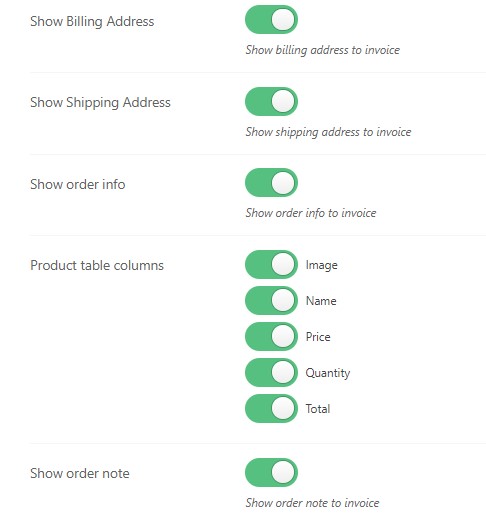
7. You can Show Billing Address, Show Shipping Address, Show order info, Product table columns, and Show order note.
8. Also, you can show Show Seal, upload custom Seal, Enable footer – show custom Footer signature, and Footer Note.

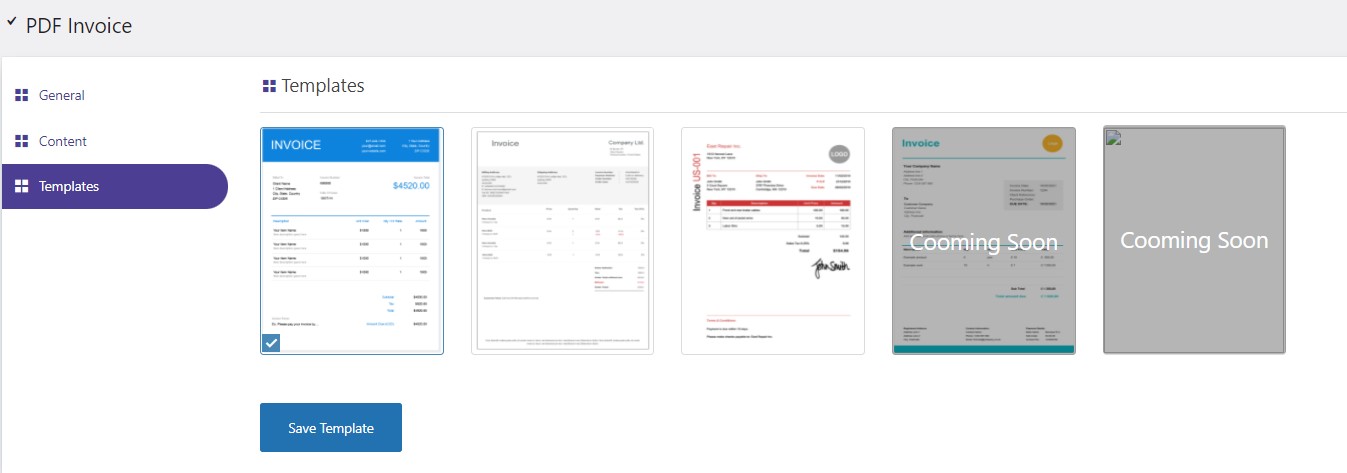
Templates
9. In the Templates tab you can choose the simple yet fully responsive premade templates to send as PDF Invoices.
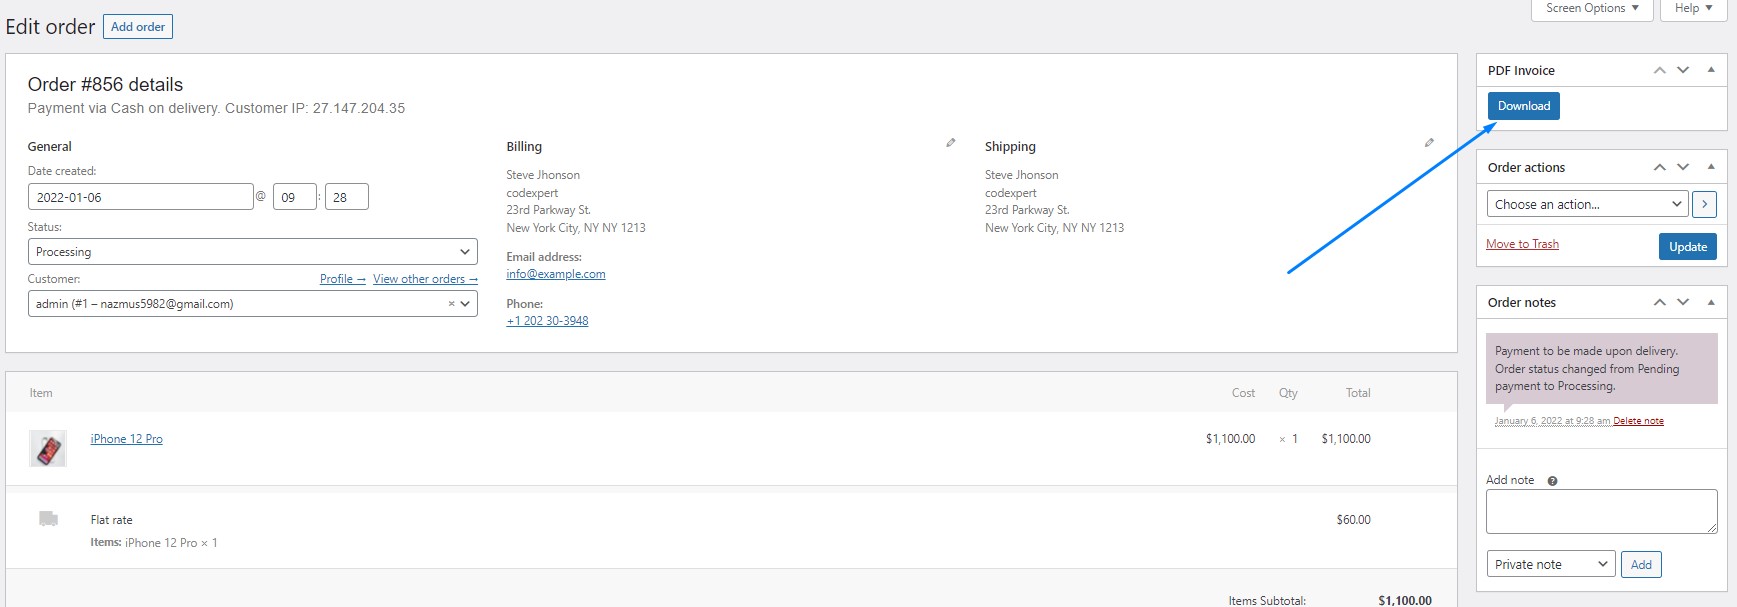
10. You will also have an option to download the invoice from the order edit page of the dashboard
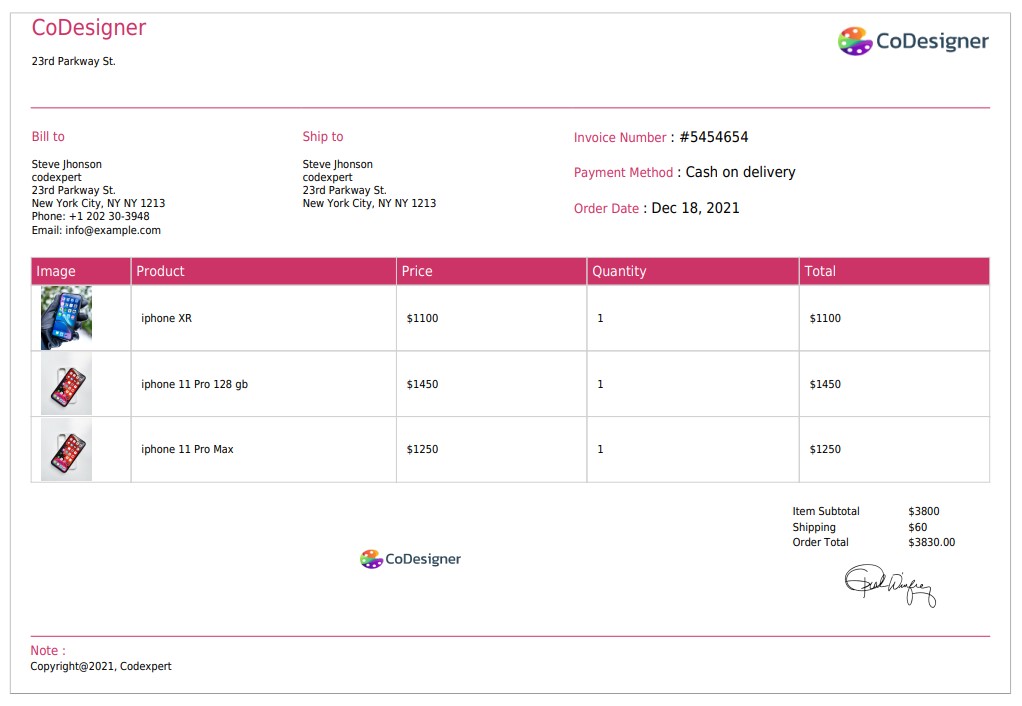
11. For example, this is how the PDF Invoice will look like after downloading. You can also try the other designs from the settings.