How to set a pricing table for your website using the Pricing Table Fancy?
A well-designed pricing page communicates the cost of your products or services. So you need to set a well-crafted pricing page that attracts your customers. For this, you can the Pricing Table Fancy widget of the CoDesigner plugin. Here is how you can set a pricing table using the Pricing Table Fancy:
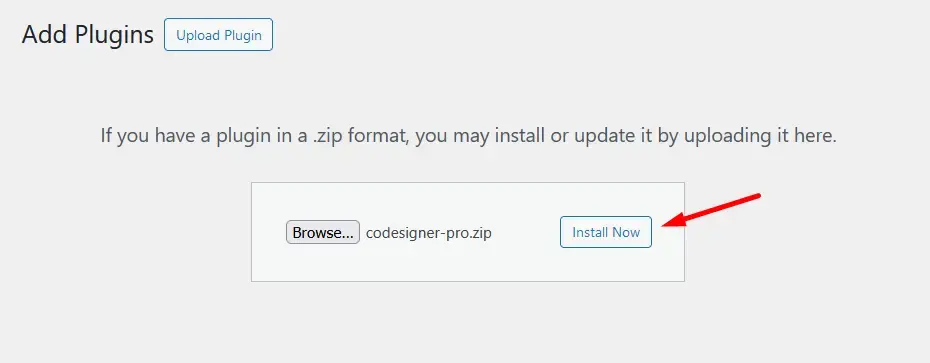
Step 1: First, install and activate the CoDesigner plugin from the site Dashboard > Plugins > Add New Plugin.
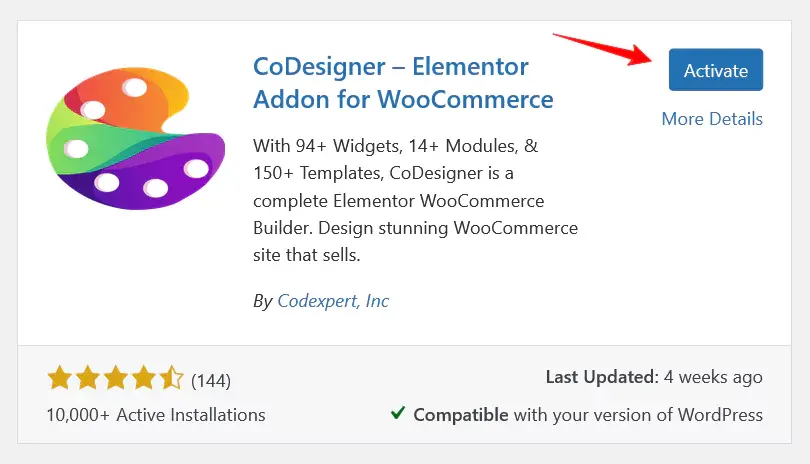
Step 2: Pricing Table Fancy is a premium feature of CoDesigner. You need to purchase CoDesigner and install it on your website.
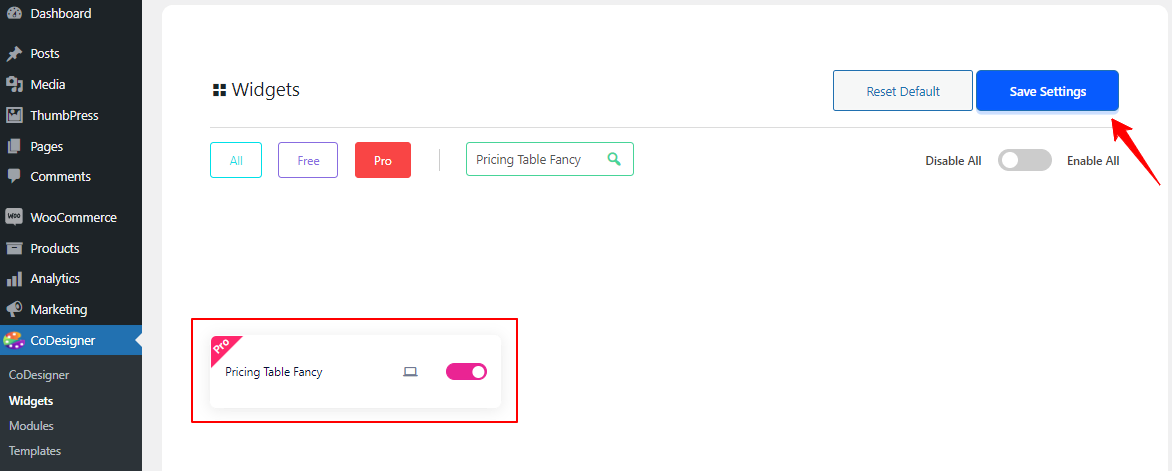
Step 3: Go to CoDesigner >> Widgets section, and enable the toggle bar of Pricing Table Fancy. Now, click on the Save settings button to save all the changes.
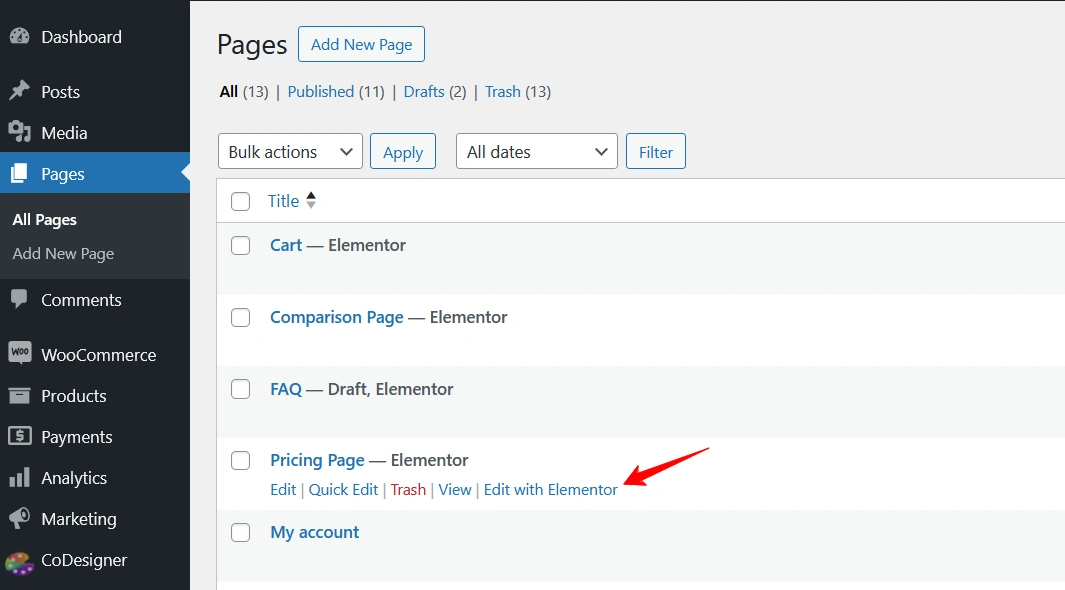
Step 4: Now, you have to create a pricing page on your website. For this, go to Pages >> Add New Page, and give a Title of your page (i.e. Pricing page). After that click on the Edit With Elementor which will allow you to open the page on Elementor.
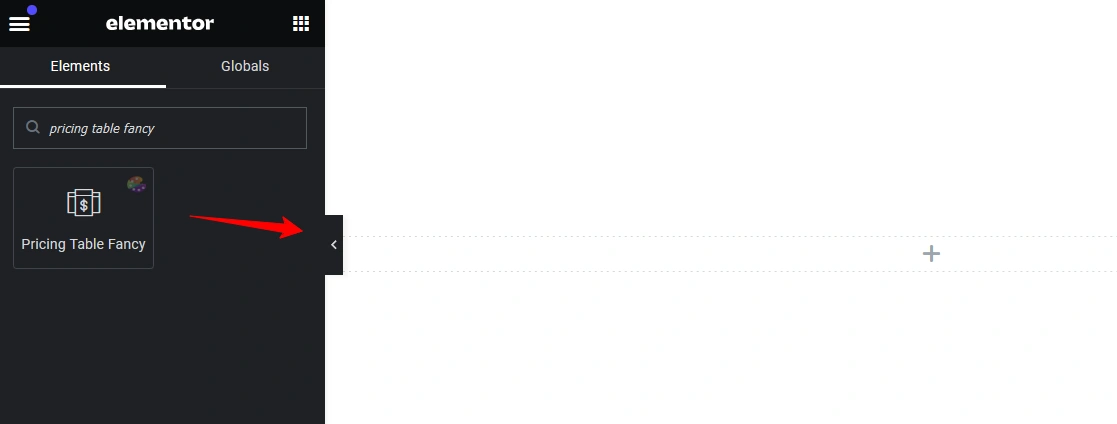
Step 5: On Elementor Editor, search for the “Pricing Table Fancy” widget. Drag and drop the widget in your preferred section on the pricing page.
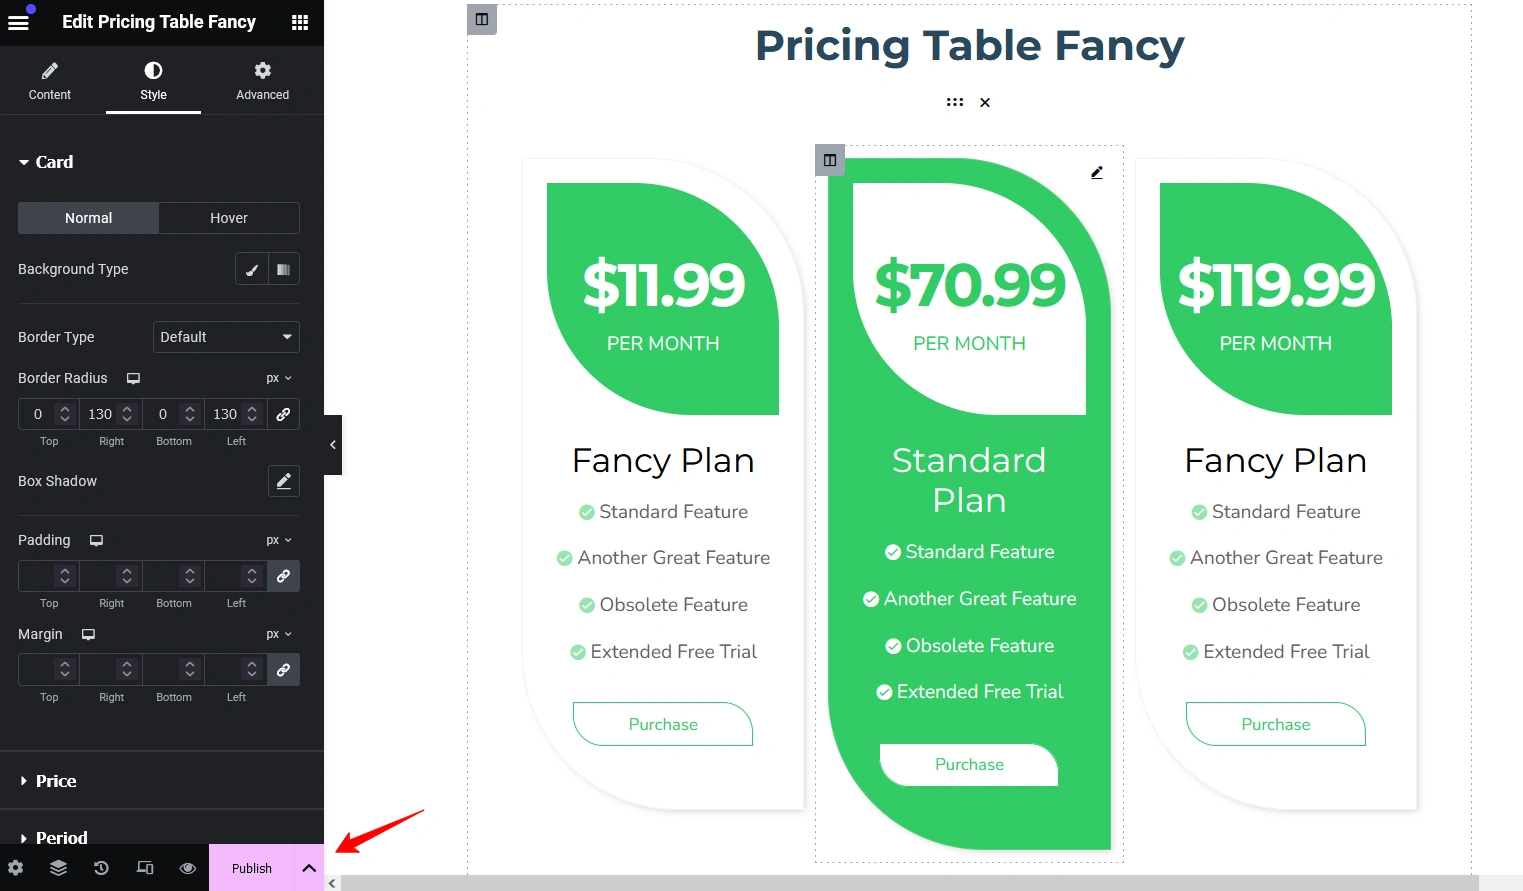
Step 5: Now, you can add your pricing table as featured or not, set various features and their icons within the pricing table, and customize the style for the card, price, period, and title sections according to your preferences. Once you’ve finished customizing your pricing page, click the Publish button.
If you encounter any issues while setting up your shop page, feel free to reach out to our support team. We’d be happy to assist you.
Was this doc helpful?


