How to customize WooCommerce Cart page?
Creating a user-friendly and visually engaging cart experience ensures that your customers navigate the checkout process easily and follow through with their purchases. Here is the step-by-step Guide to Create & Customize Cart Page in WooCommerce:
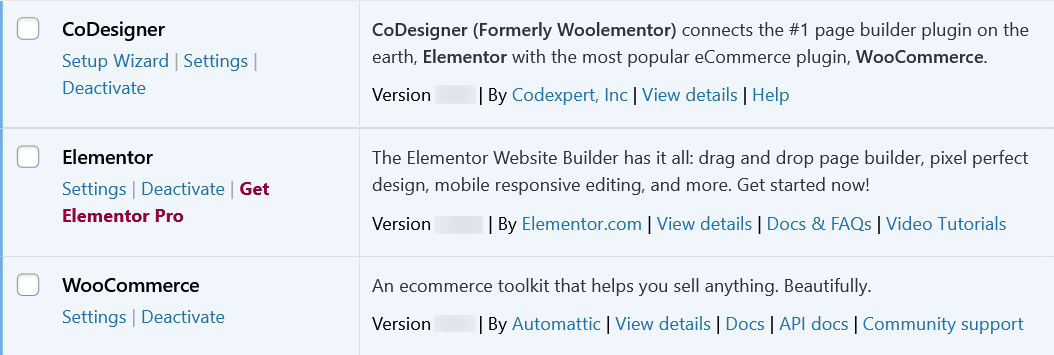
Step 1: Make sure you have the following WordPress plugins installed and activated on your site –
- WooCommerce
- Elementor
- CoDesigner
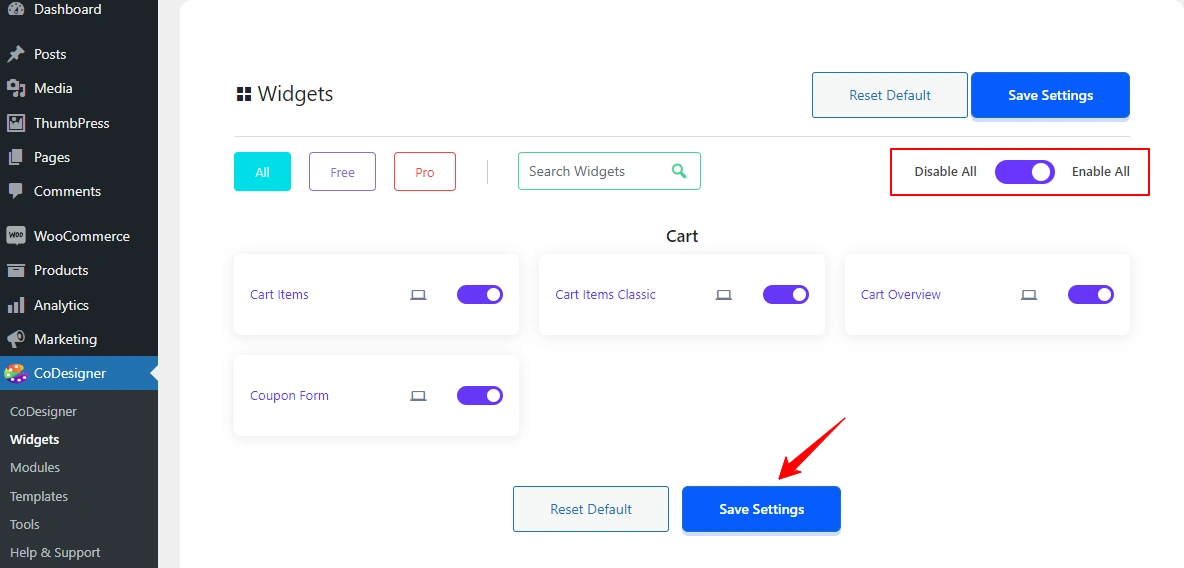
Step 2: Go to the Widgets section from CoDesigner and enable the right widgets after that click Save Settings.
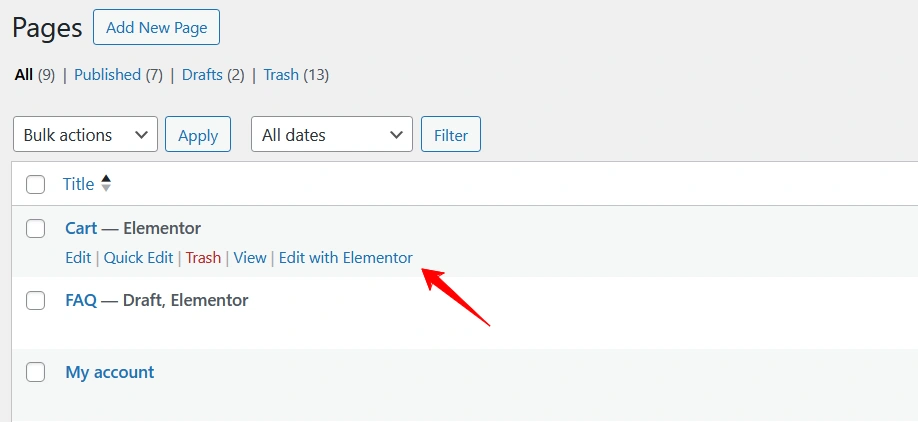
Step 3: To customize the cart page in WooCommerce, go to the Pages section within your WordPress dashboard. Click Edit with Elementor to customize the cart page.
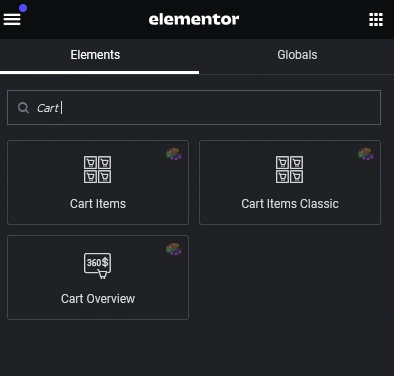
Step 4: Search for the Cart Items/ Cart Items Classic widget. Drag and drop the cart items widget to the desired section. Drag and drop the other cart widgets in the remaining section following the same method.
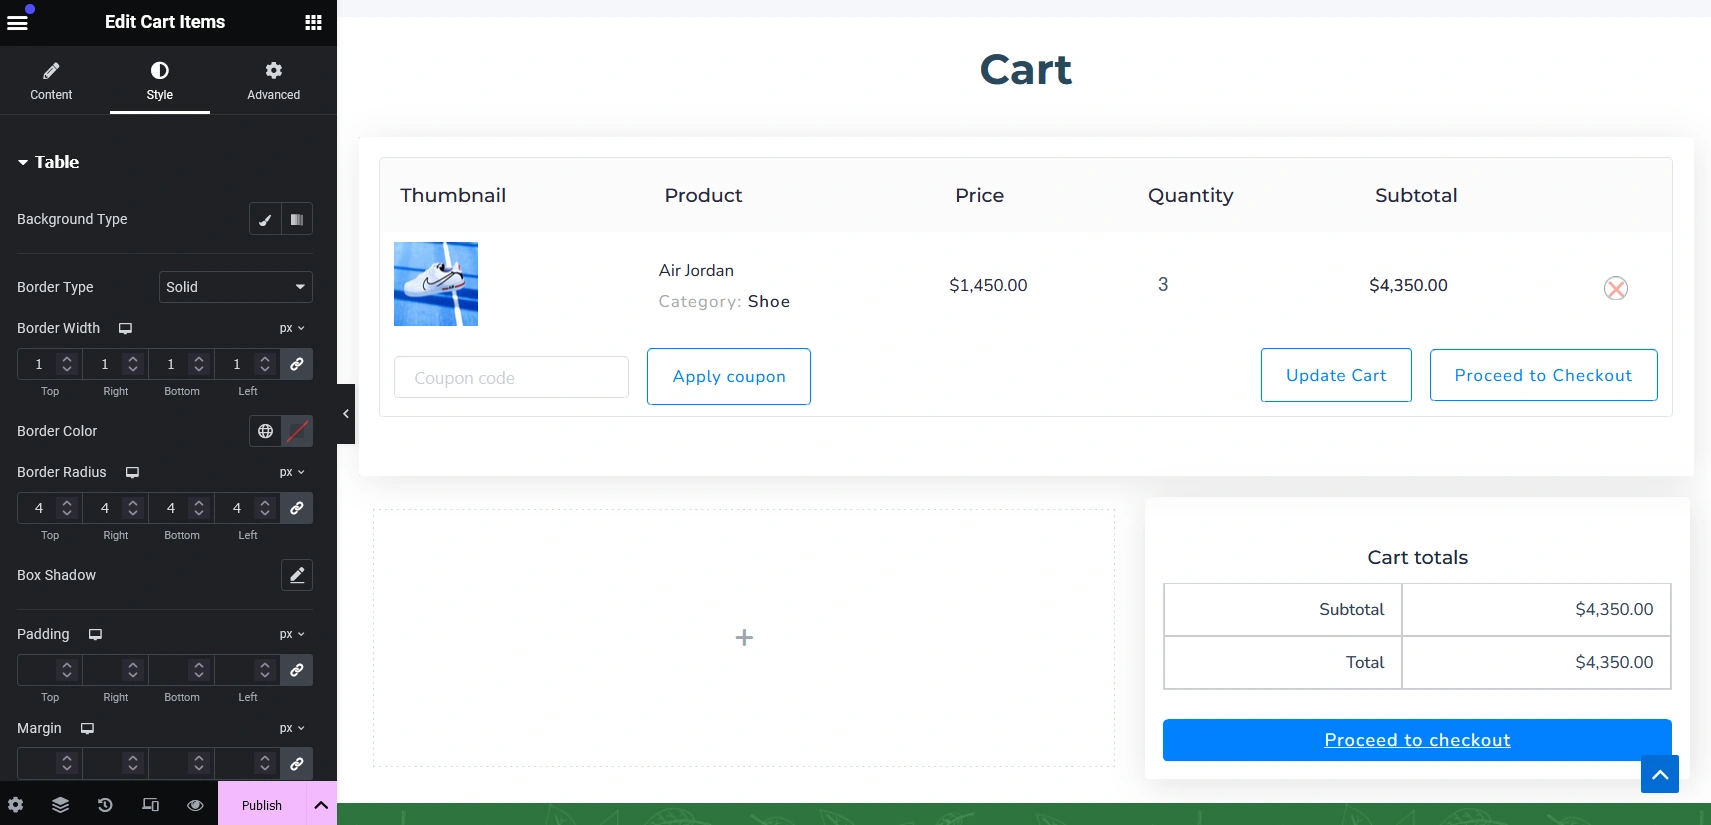
Step 5: To add style and customize the cart page select the Cart Items/Classic widget section. Find the customization options for Cart Items elements including Content, Style, and Advanced. You can add your desired style to every aspect. Click on the Publish button to save the changes you made.
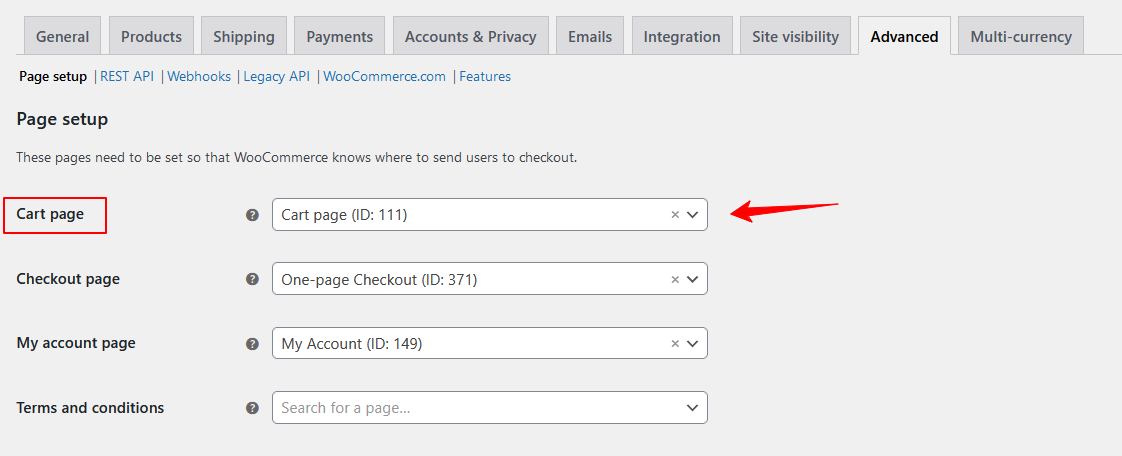
Step 6: When you are done customizing your cart page you need to set this as a default. Navigate to WooCommerce > Settings > Advanced to set your newly designed cart as a default by selecting from the dropdown. Finally, after setting cart as default, click on the Save Changes button.
Your cart page is live now. Check and double check your cart page. If you find anything wrong, reach out to our support without any delay. You can contact to us from Live Support.
Was this doc helpful?


