How to create a Wishlist page for your WooCommerce shop?
Wishlist is a common feature that customer always want. Especially if it is a eCommerce site. You can provide your customers a user-friendly experience using the Wishlist Widget:
Step 1: First, install and activate the CoDesigner plugin from the site Dashboard > Plugins > Add New Plugin.
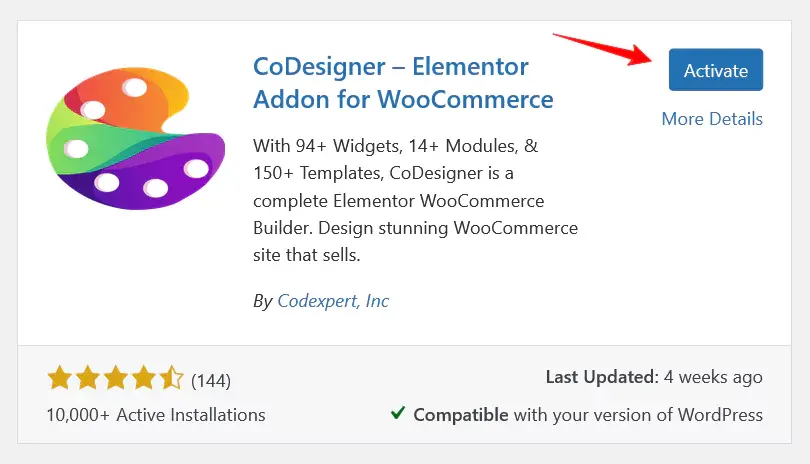
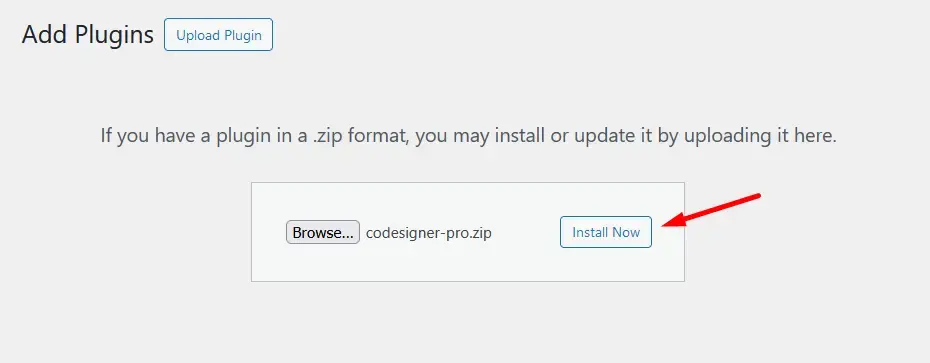
Step 2: You’ll need the Pro version of CoDesigner to access the Related Products Table widget. To do this, Visit CoDesigner and choose a plan to purchase it.
Step 3: If you don’t have an account to purchase the pro version, it’s easy to create one. Enter your email address, choose your first name, the last name, and create a secure password and payment information. That’s all you need to have the pro version.
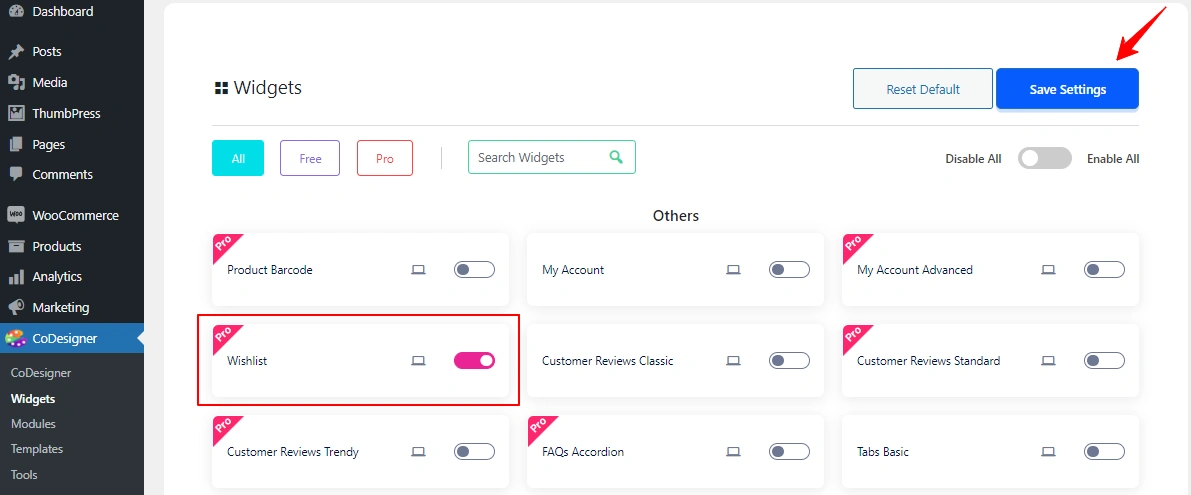
Step 4: Go to CoDesigner Pro>> Widgets section, and enable the toggle bar of the wishlist. Now, click on the Save settings button to save all the changes.
Step 5: Now, you have to create a Wishlist page on your website. For this, go to Pages > Add New Page, and give a Title of your page (i.e. Wishlist). After that click on the Edit With Elementor which will allow you to open the page on Elementor.

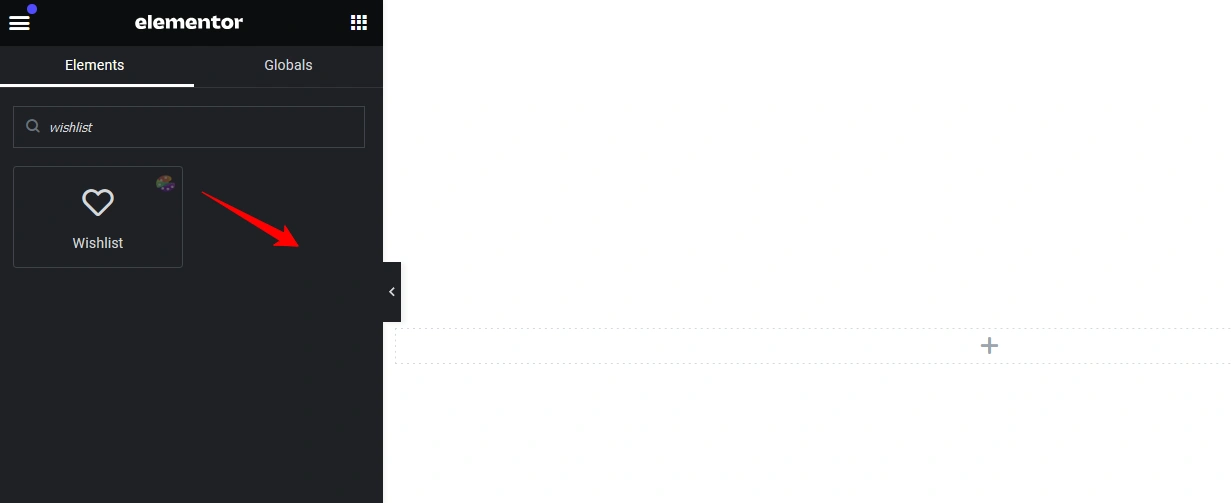
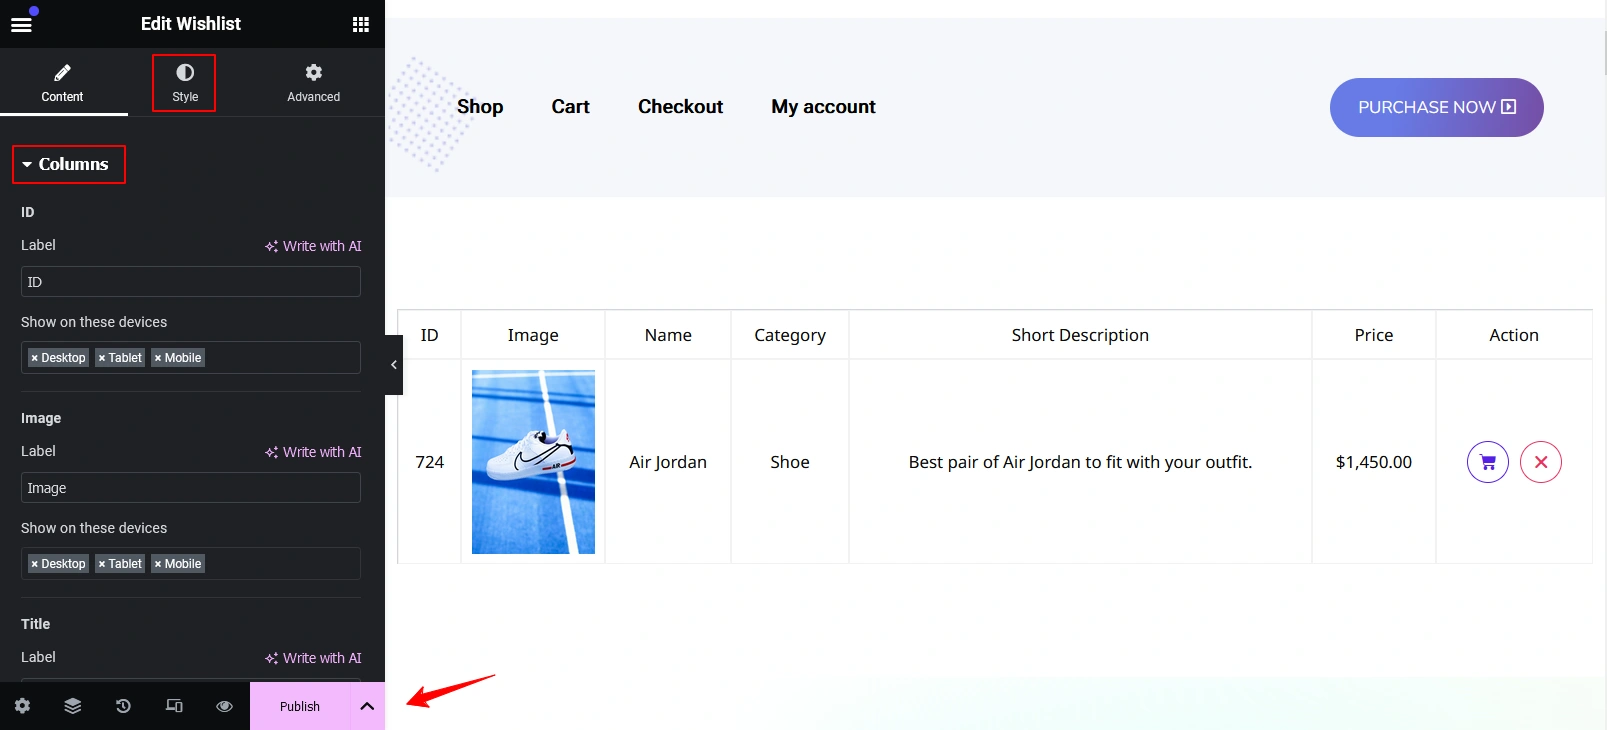
Step 6: On Elementor Editor, search for the Wishlist widget. Drag and drop the widget in your preferred section on the wishlist page.
Step 7: Do the necessary customization to your wishlist page from the Style tab. You can add product ID, Image, Name, Category, Shop descriptions, Pricing, etc. After the customization, click on the Publish button to save the changes.
Was this doc helpful?

