How do I design My Shop Page using Shop Classic?
Create an eye-catchy custom shop page using CoDesinger Shop Classic widget. Before you start, make sure you have installed and activated CoDesigner. Now follow the step-by-step process shown below:
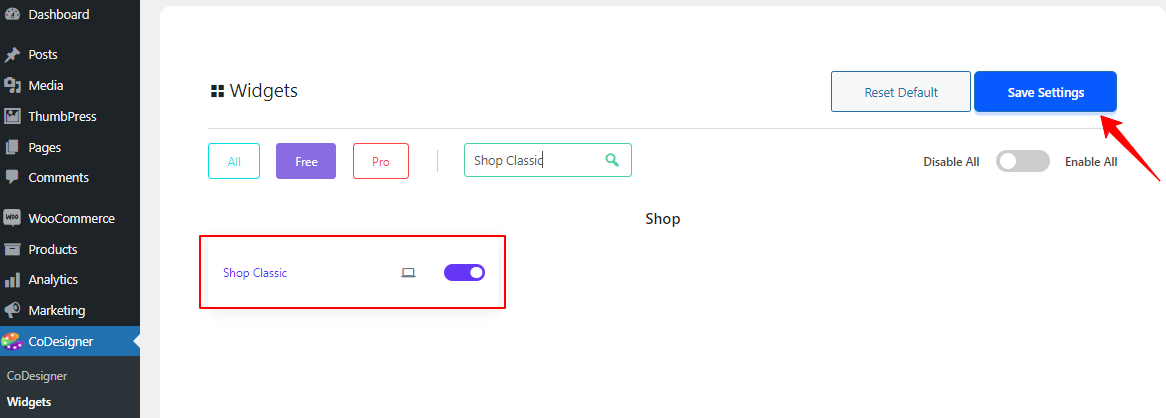
Step 1: Go to the Widgets section from CoDesigner, enable the Shop Classic widget and click on Save Settings.
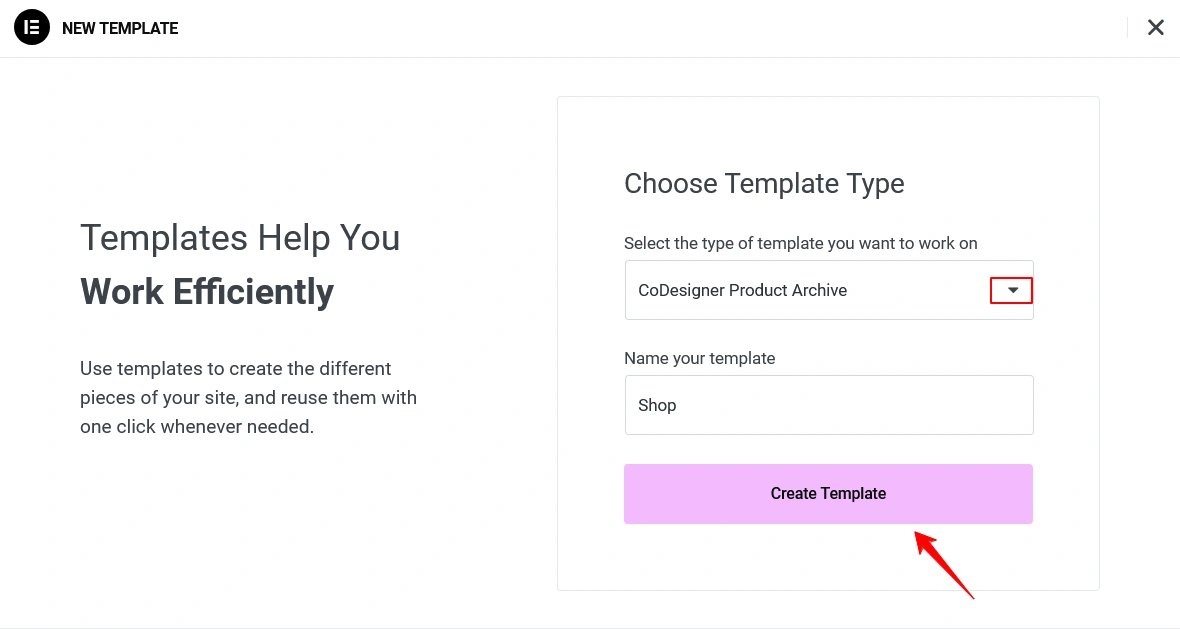
Step 2: Now, you need to create a Shop template. For that head to the Templates >> Add New and select CoDesigner Product Archive from the drop-down. Provide your template a name and click on the Create Template button.
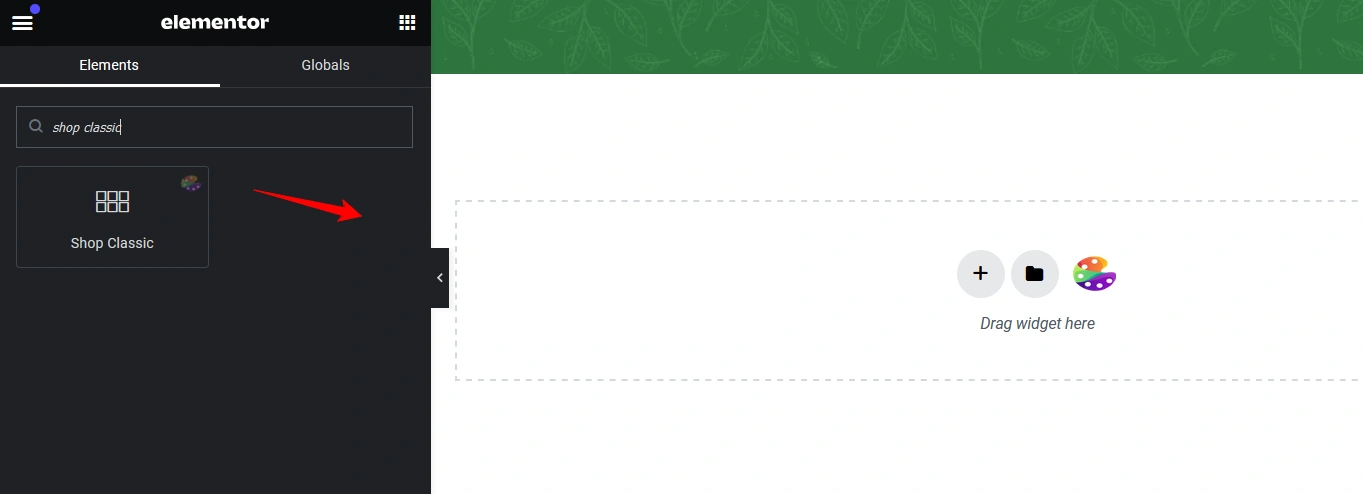
Step 3: From the Editor, search for the Shop Classic widget and drag it to the Elementor section.
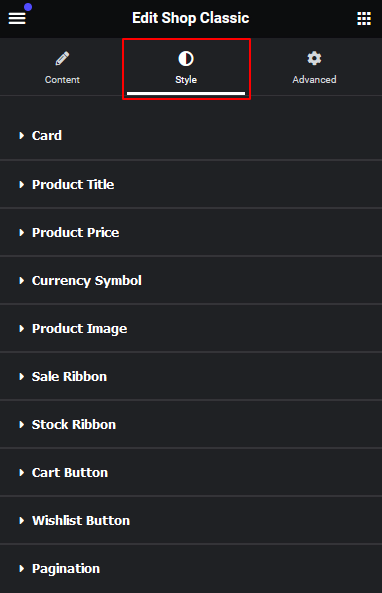
Step 4: Customize your shop page based on your preferences. For this, go to style tab of the Elementor editor.
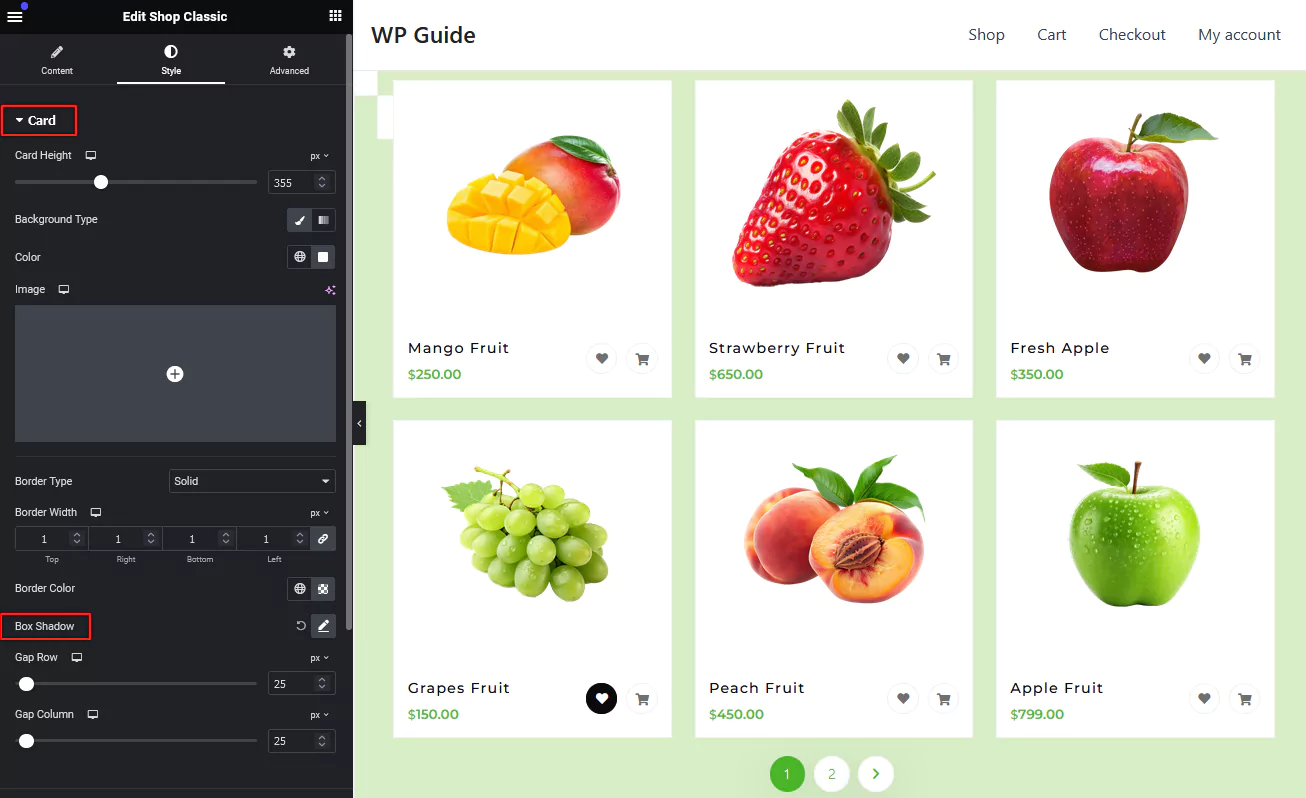
Step 5: Shop Classic widget offers various design options . You can customize the product card’s height, weight, shadow, background as well as the gaps between row and column.
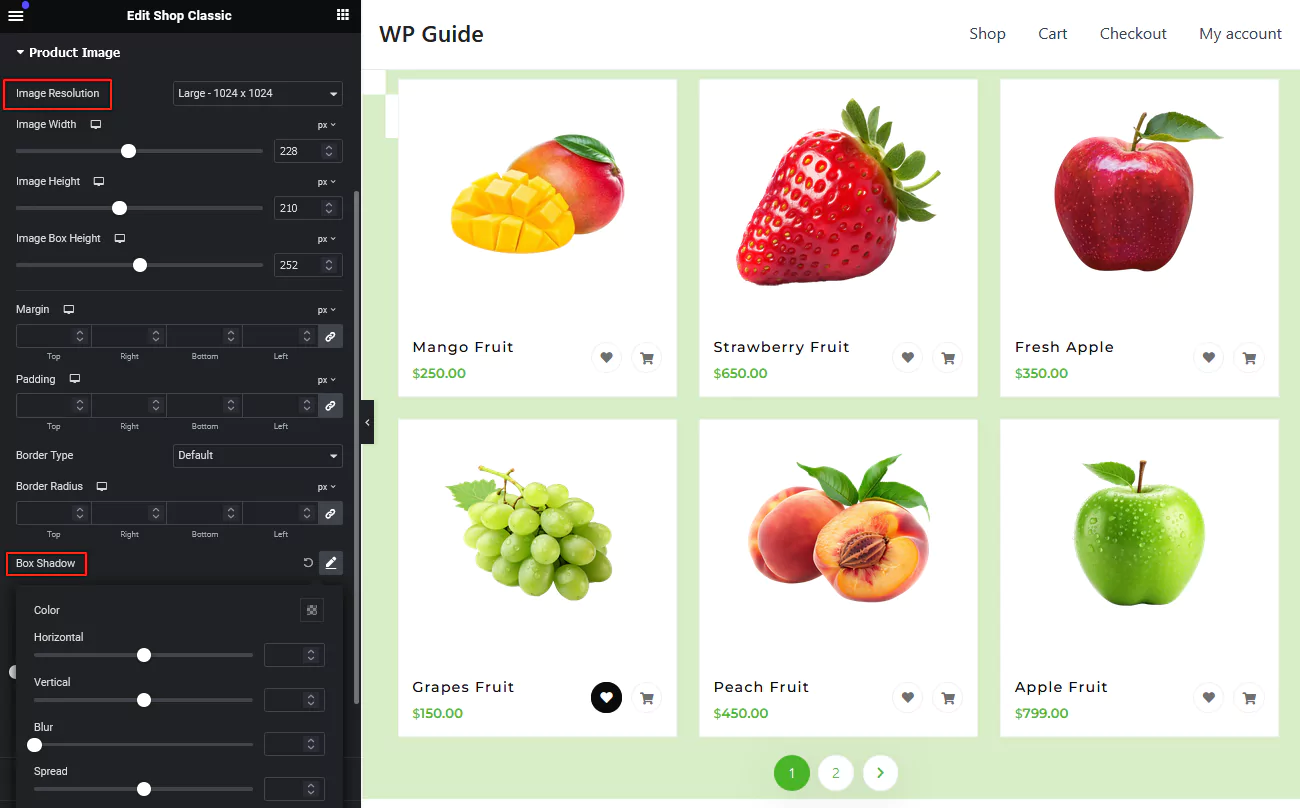
Step 6: You can also modify the basic style elements such as title typography, text size, fonts and its weight. The amazing part is you have control over the product images settings. This part includes image height, width, image box width. To enhance the appearance of your product’s image you can add margins, padding and box shadows.
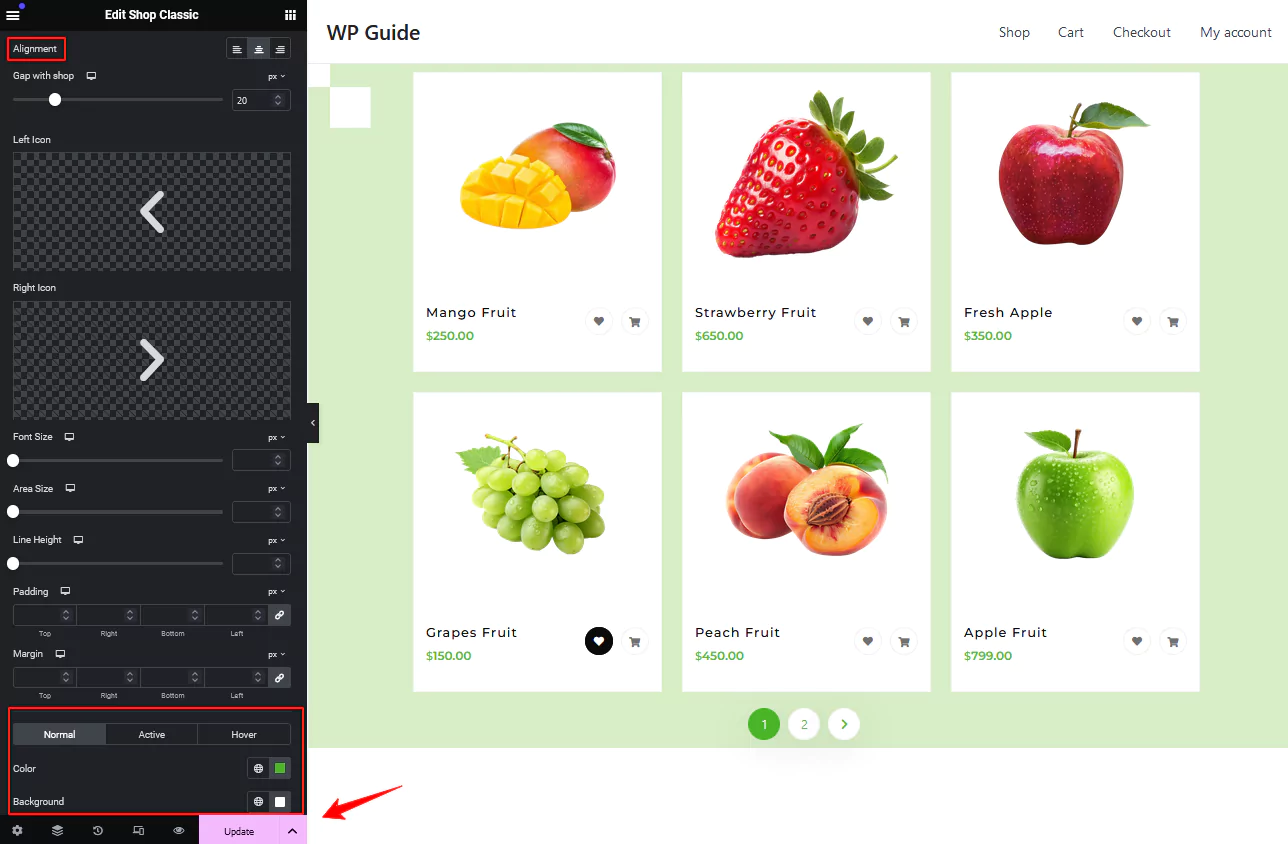
Step 7: For pagination on your Shop page, you can apply design changes like alingnment of the pagination, adding hover effect, changing background colors etc. Finally, when your customization is complete, click on the Publish or Update button.
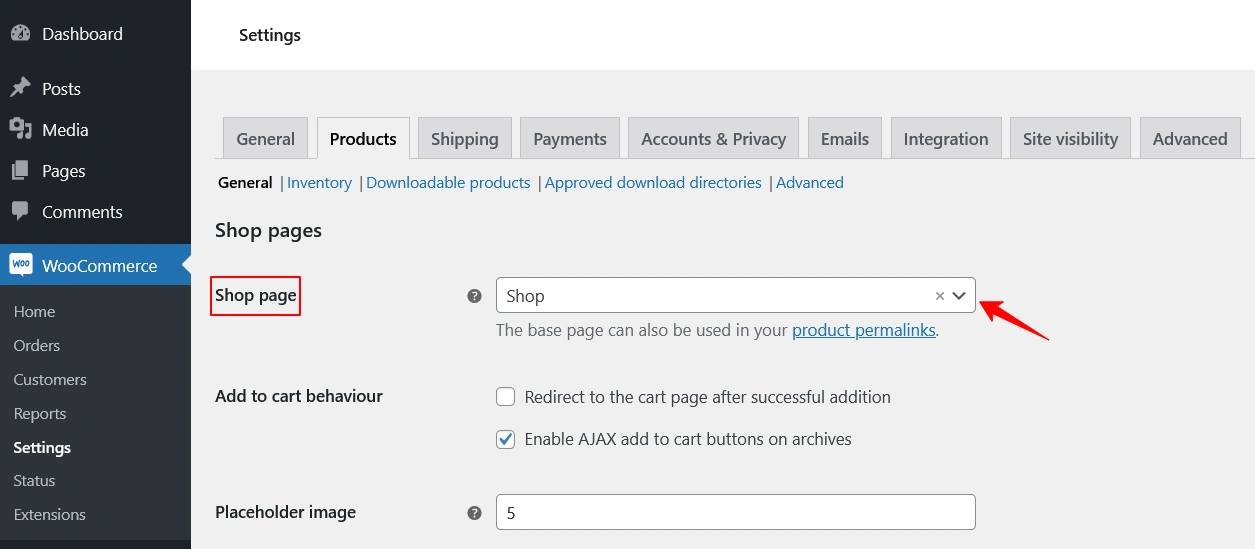
Note: You must set this shop page as the default one from WooCommerce Settings >> Products and Select Shop from the drop-down menu.
Thats it! Your shop page is ready for use. If you face any difficulties setting up your shop page, don’t hesitate to reach out to our support.
Was this doc helpful?


