How do I create a custom checkout page for my WooCommerce store?
Shopping cart abandonment is a major problem for online stores. And more often than not, a clunky checkout page can be the culprit. It’s a most important thing to create and customize the checkout page to a user-friendly experience that converts visitors into customers.
Here’s the steps how you can create a custom-made checkout page with CoDesigner widgets:
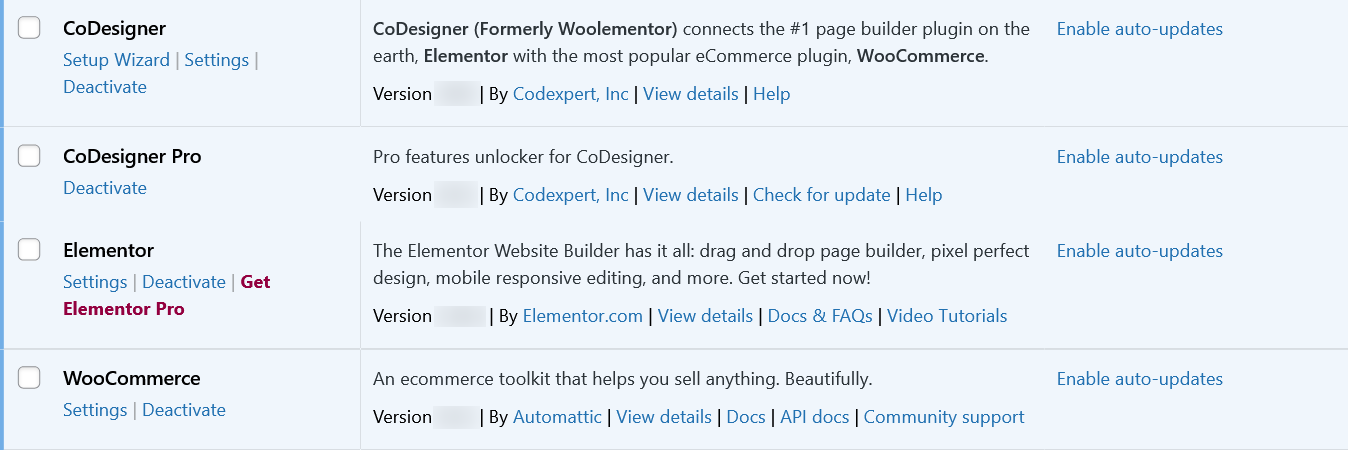
Step 1: Make sure you have the following WordPress plugins installed and activated on your site –
- WooCommerce
- Elementor
- CoDesigner
- CoDesigner Pro
Step 2: Checkout customization is a Pro feature of CoDesigner. To design beautiful checkout pages you have to grab the CoDesigner premium package.
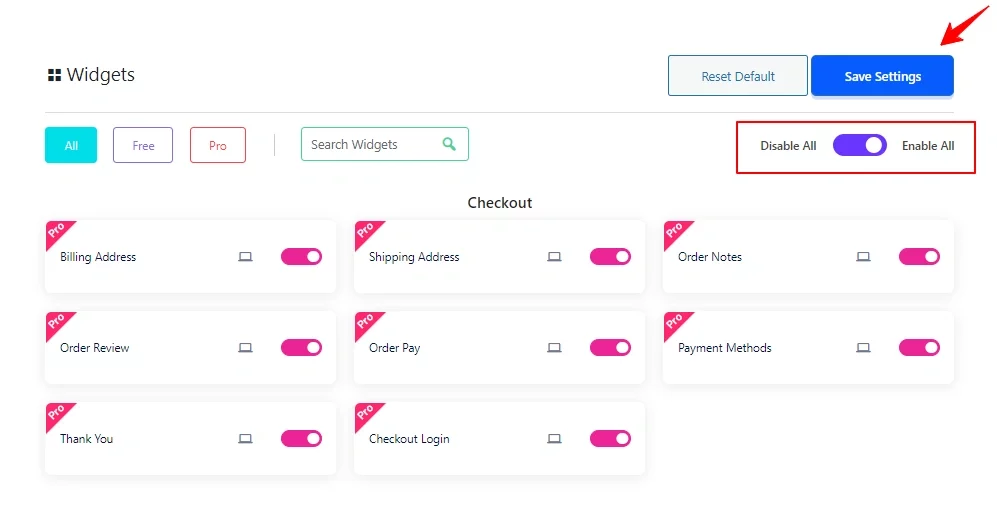
Step 3: Now make sure you have all the CoDesigner checkout widgets enabled. Go to Dashboard > CoDesigner Pro > Widgets, enable all the widgets for checkout and hit Save Changes.
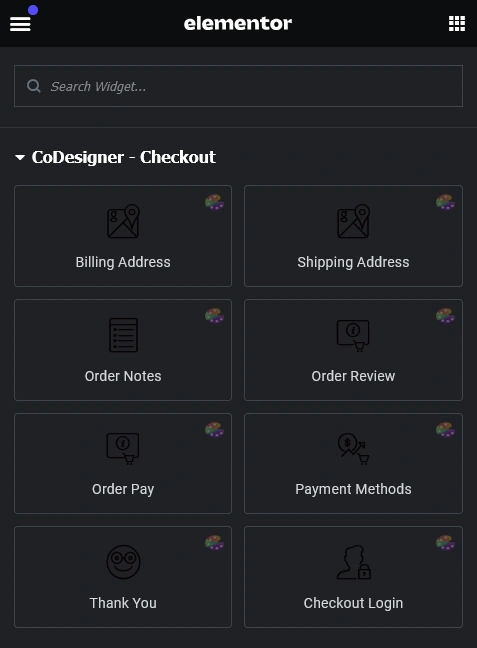
Step 4: Create a new page and edit the page with Elementor. Look for the CoDesigner widgets in the Elementor search bar. Find the checkout widget you want to add and drag them to the desired section.
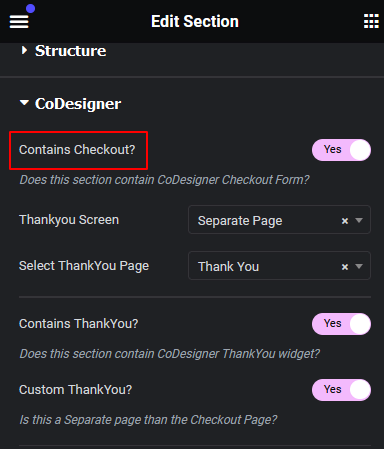
Step 5: Once you’ve finished customizing, select the entire Elementor section and enable the ‘Contain Checkout?’ button from the Layout section. Then click the publish button to save changes.
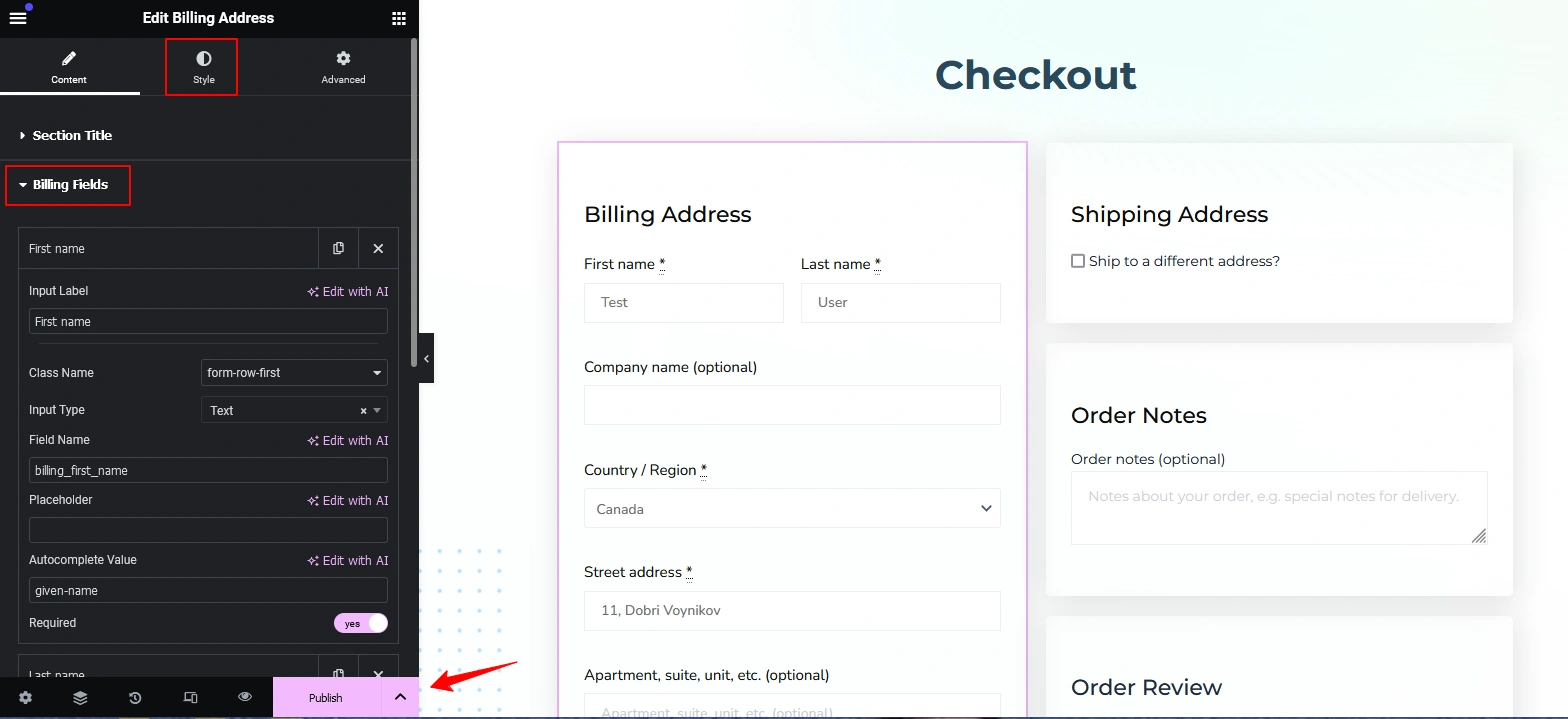
Step 6: You have to enable ‘Contain Checkout?’ button from the Layout section. Don’t forget to enable this otherwise your checkout page won’t work properly.
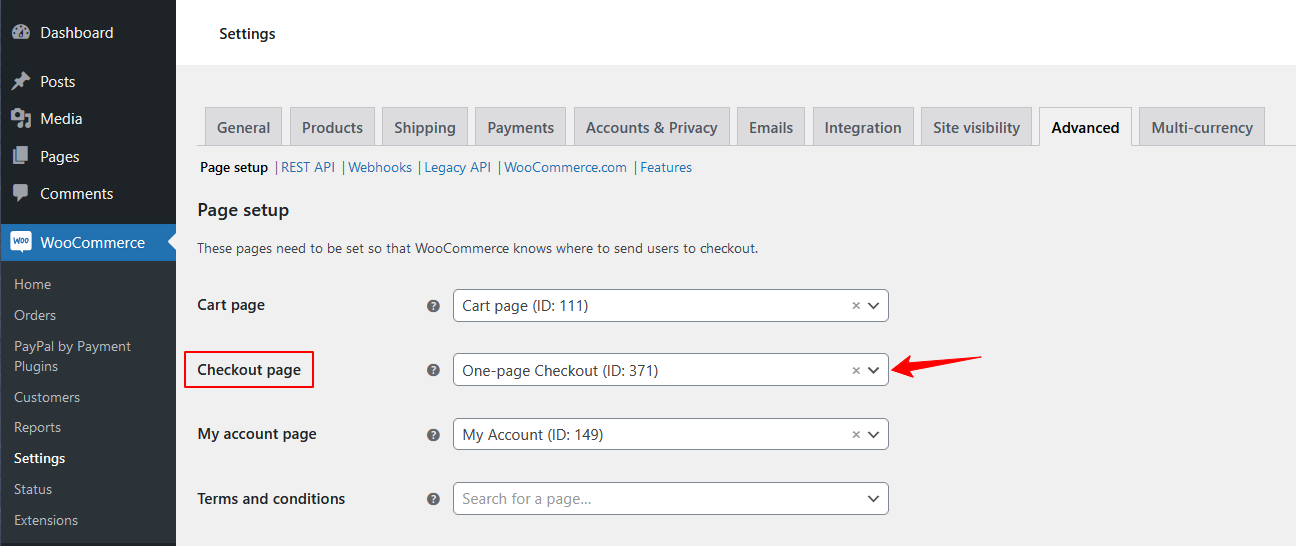
Step 7: You need to replace the default checkout page with the new checkout you have just created. To do this, go to WooCommerce > Settings > Advanced and replace the default in the checkout section. After that, click on the Save Changes button.
Was this doc helpful?


