How can I design my shop page using the Shop Flip widget?
Create a visually appealing custom shop page using CoDesigner’s Shop Flip widget. This widget will apply an interactive effect to your product images, where the product image flips to reveal additional information when the user hovers over it. To design a shop page using this widget first, you have to install and activate the CoDesigner and CoDesigner Pro plugin in your website. Then follow the steps:
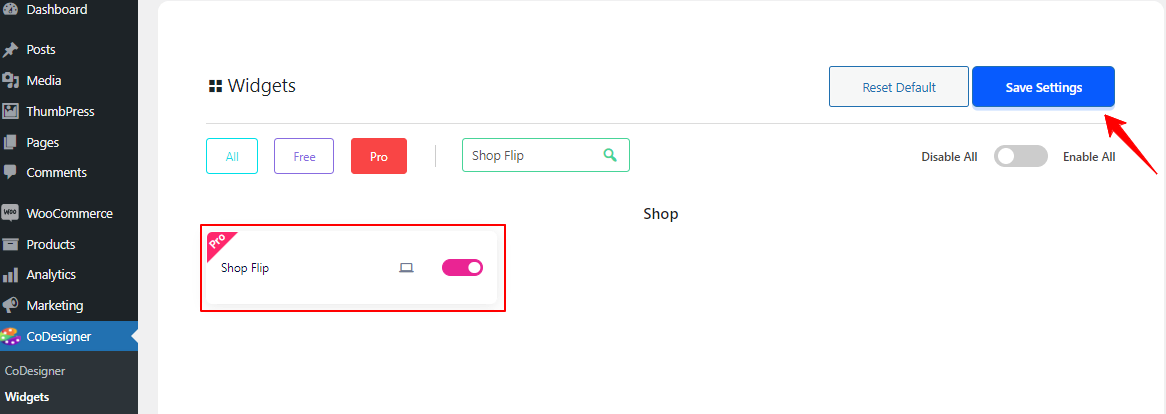
Step 1: Go to CoDesigner >> Widgets, turn on the Shop Flip widget, and then select Save Settings.
 Now, you have to
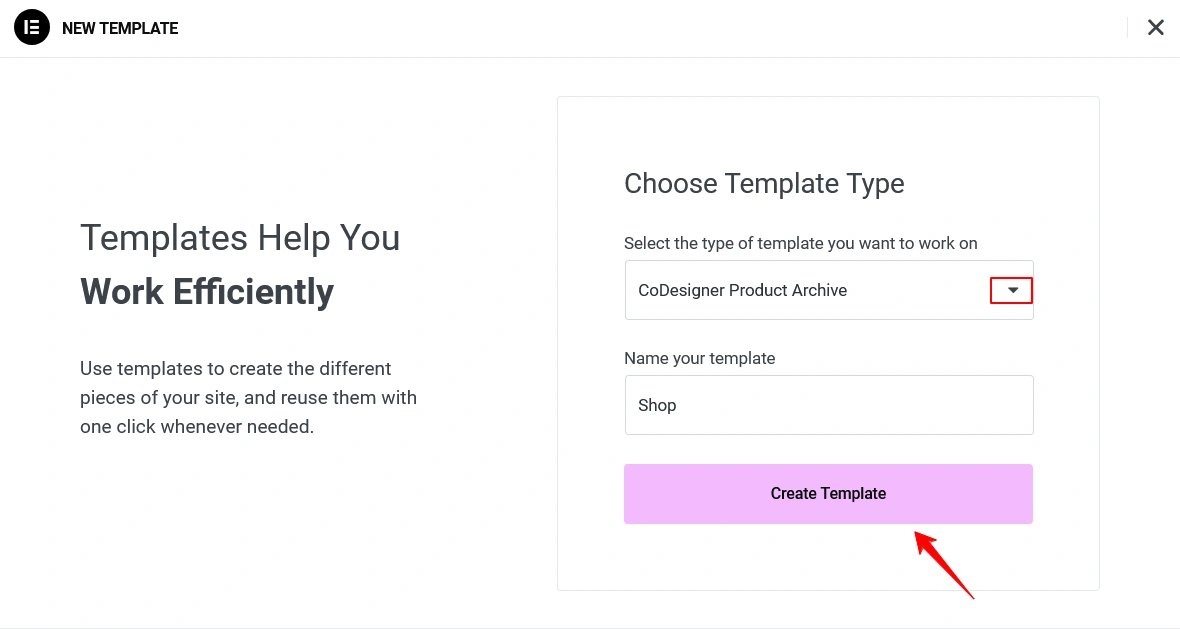
Step 2: Next, you need to create a Shop template. Navigate to Templates and select the Add New button. In the drop-down menu, choose CoDesigner Product Archive. Then give your template a name and click the Create Template button to finalize it.
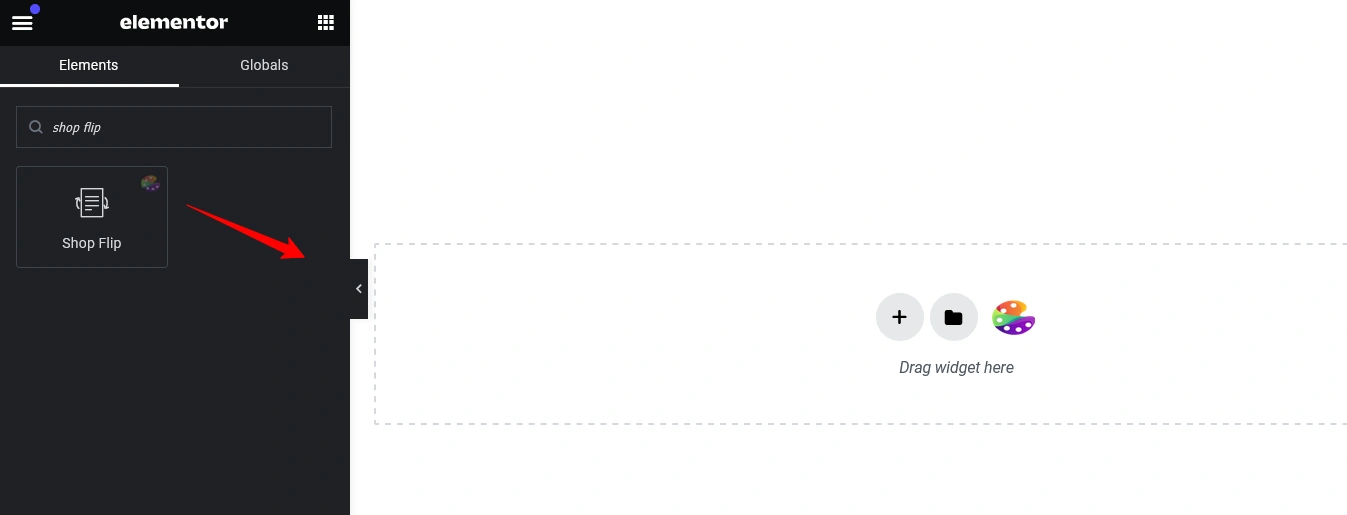
Step 3: From the Elementor Editor search for the Shop Flip widget and drag it into your preferred section.
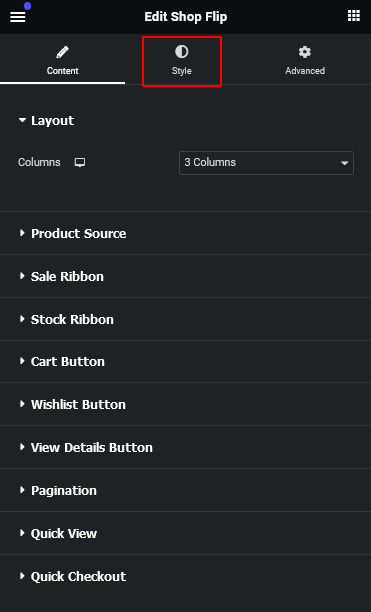
Step 4: Customize your shop page to suit your preferences. For this, go to the style tab of the Elementor editor.
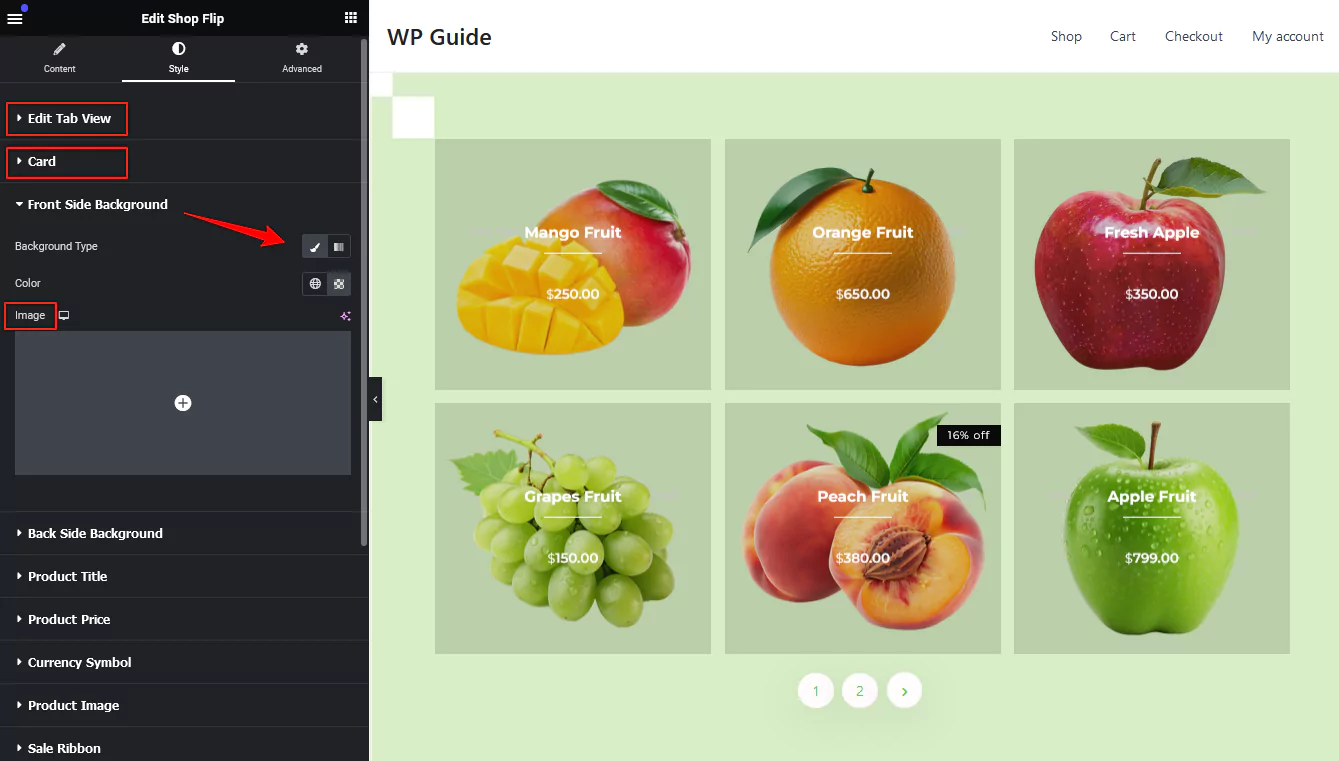
Step 5: You can fully customize both the front and back of the flip card by editing elements like the background, product title, description, price, and sale ribbon. To customize the back side’s background, multiple options are available. For the front side, simply click on the Front Side Background to make changes. You can switch the background to a gradient, choose different colors, set the gradient style (linear or radial), and adjust the angle. From Card tab, you can modify the animation speed and the spacing between columns and rows. If you’d like, you can also add a background image instead of a color. The front side of the card can be customized in the same way, allowing you to make the flip card more dynamic and visually appealing by tweaking both sides to suit your needs.
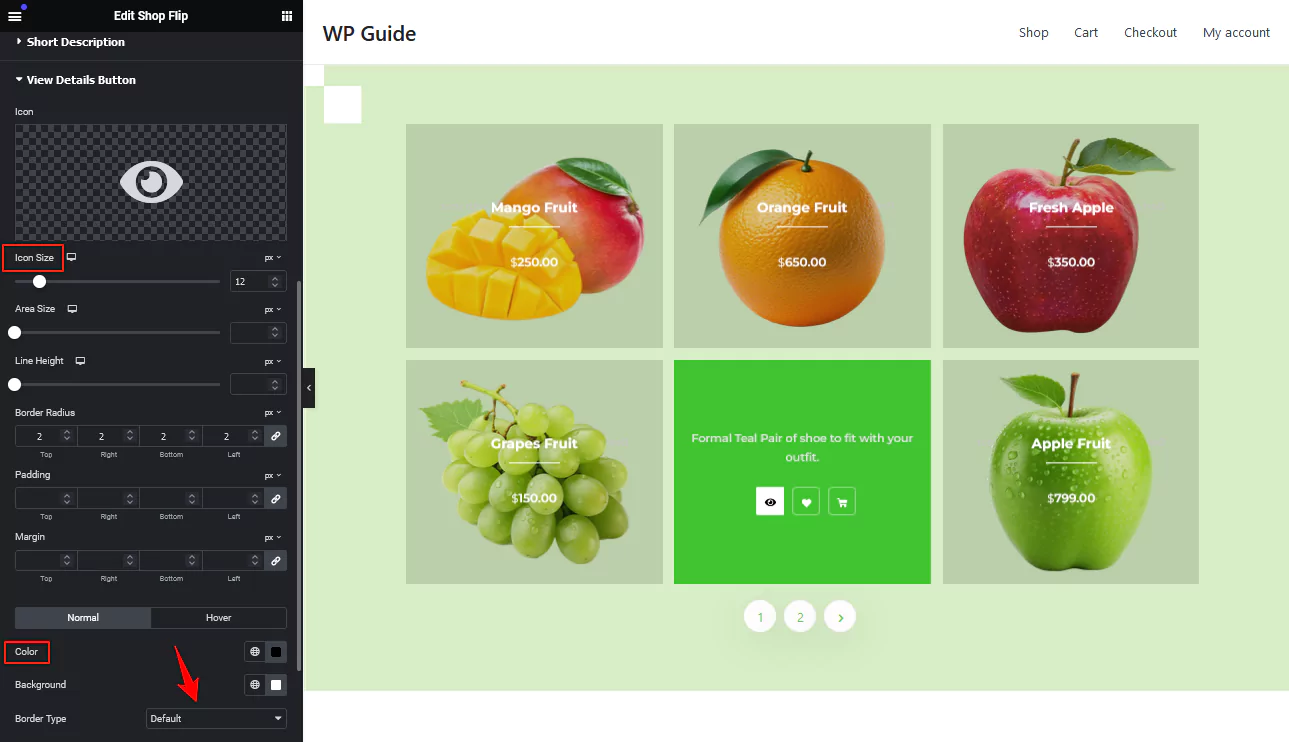
Step 6: You can customize the View Details Button by adjusting several settings, such as the icon size, area size, line height, border, and background. Similarly, you can personalize the Wishlist button and Cart button using the same options. After making all your changes, simply click the Publish button to save and apply them.
Step 8: Lastly, assign the template to your Shop page, when you’re done with your customization.
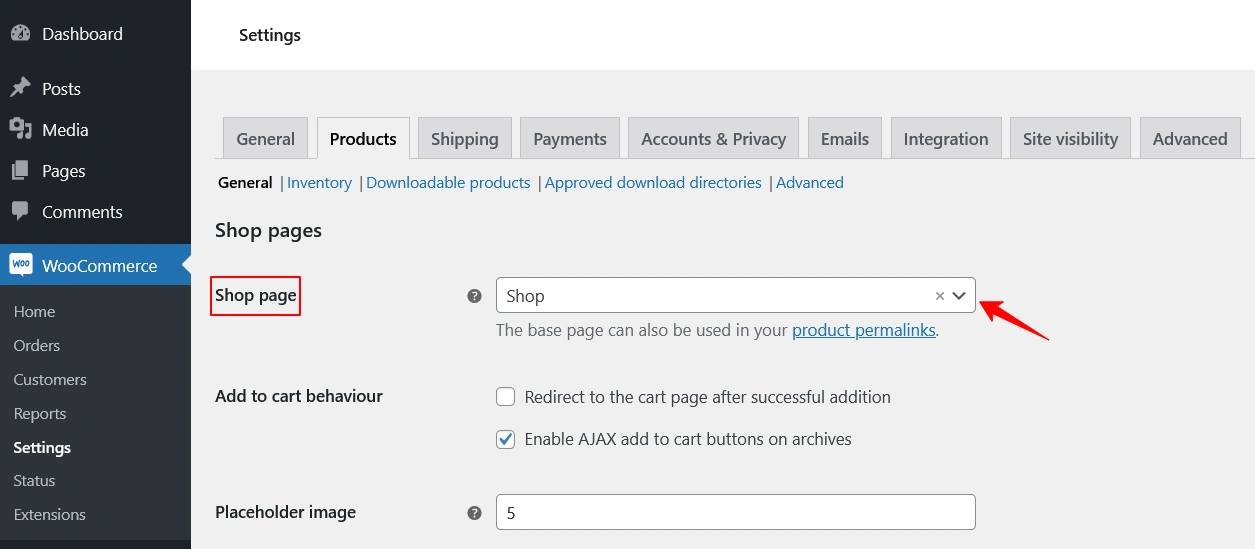
Note: In WooCommerce, make sure you go to the Settings >> Products section and set this shop page as the default.
If you encounter any issues while setting up your shop page, feel free to reach out to our support team.
Was this doc helpful?


