How can I add Sales Notification on my website?
Live sales notifications are a powerful tool for showcasing social proof in action. Seeing proof that others have purchased and trust a product makes us feel more comfortable doing the same.
Follow the steps below to add sales notification with the help of Codesigner Sales Notification Widget:
Step 1: Make sure you have the following WordPress plugins installed and activated on your site –
- WooCommerce
- Elementor
- CoDesigner
- CoDesigner Pro
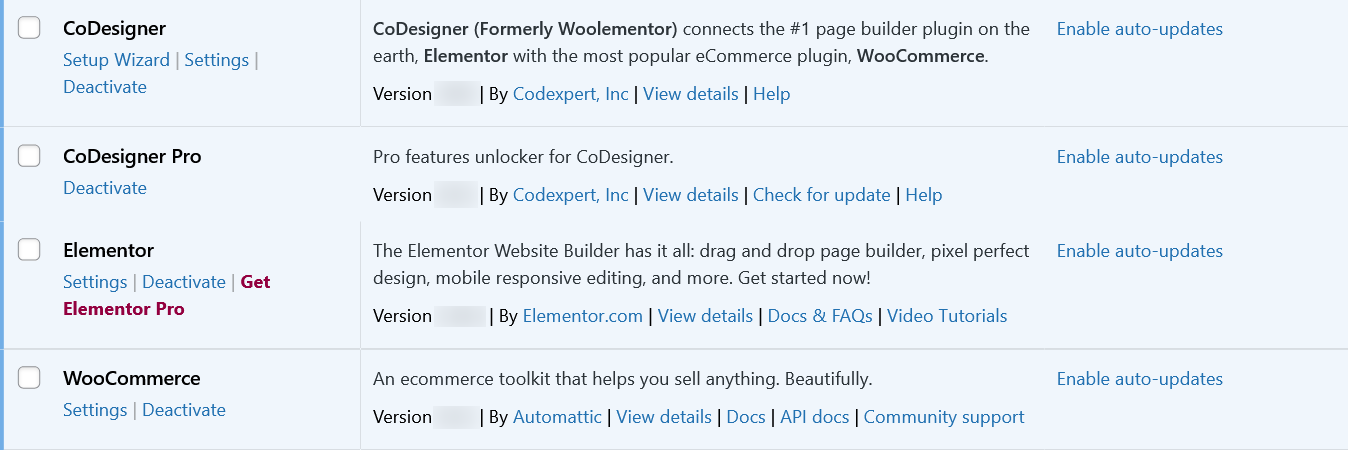
Step 2: Sales Notification is a Pro feature of CoDesigner. To add Sales Notification on your site you have to grab the CoDesigner premium package.
Step 3: If you don’t have an account to purchase the pro version, it’s easy to create one. Enter your email address, choose your first name, the last name, and create a secure password and payment information. That’s all you need to have the pro version.
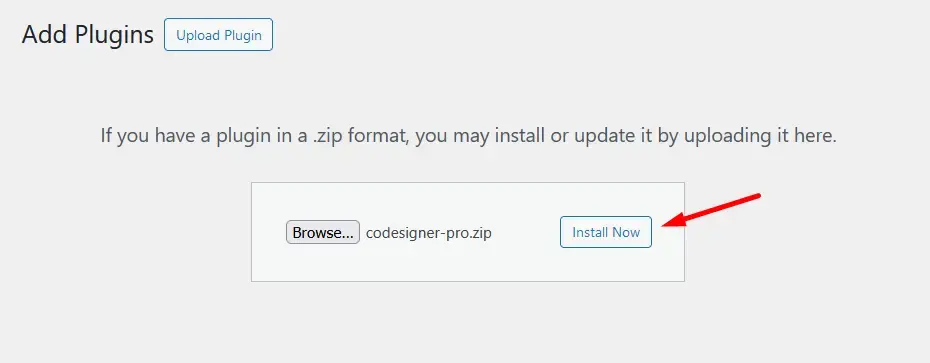
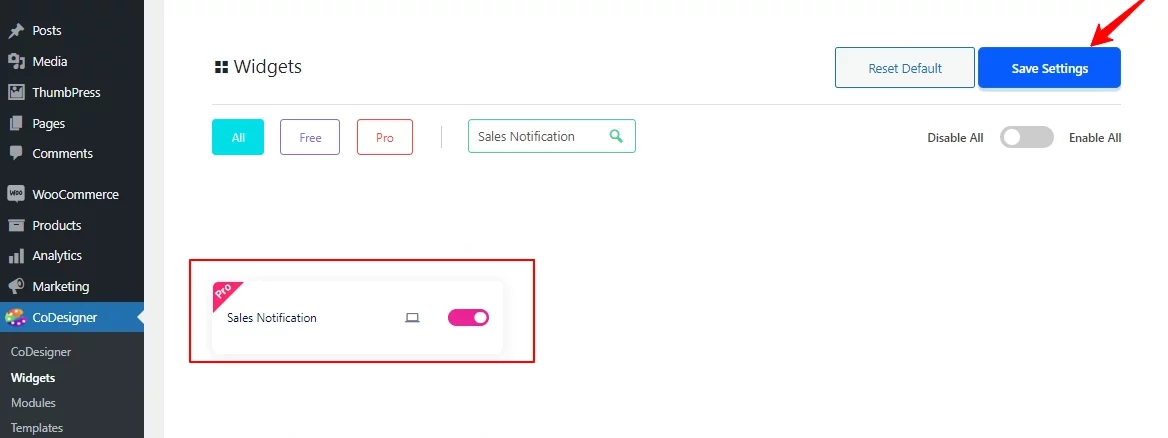
Step 4: Once you have successfully installed the pro version of the plugin, go to CoDesigner > Widgets > Sales Notification and enable the widgets. Then Click the Save Settings.
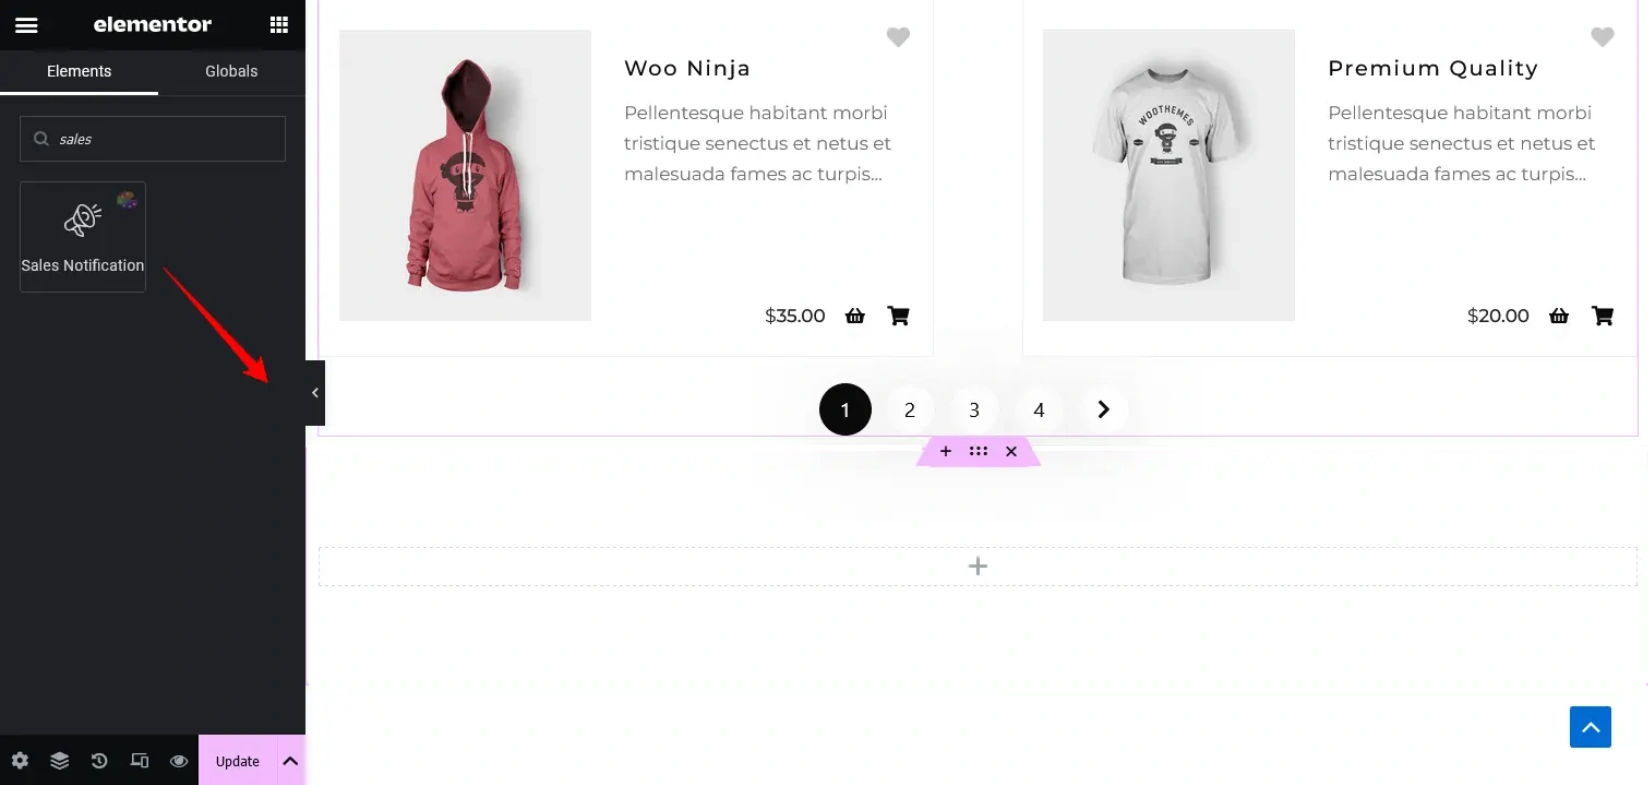
Step 5: Create a new section below your shop page and drag the Sales Notification widget from CoDesigner to the new section. You can add a live sales notification to WooCommerce on any page of your website.
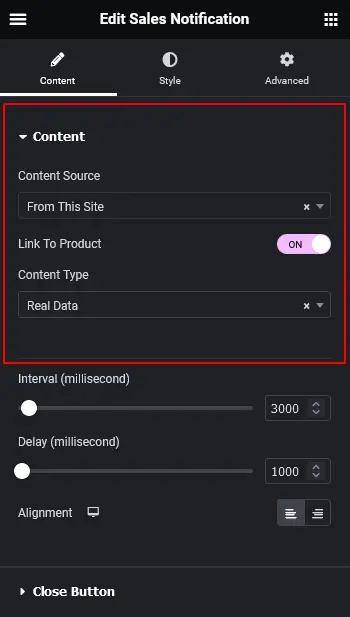
Step 6: Ensure that your settings are properly configured. Make sure your content source is set to “From This Site.” Next, enable the “Link to Product” button. Finally, set the content type to “Real Data.” You can also add Numbers of Orders, Specific Product Notifications, Order statuses, and Intervals to each notification.
Was this doc helpful?

