Step by step guide for setting up Share Logins
The Share Logins Pro plugin is a handy tool that can be easily configured and used.
Simple steps to get it working: #
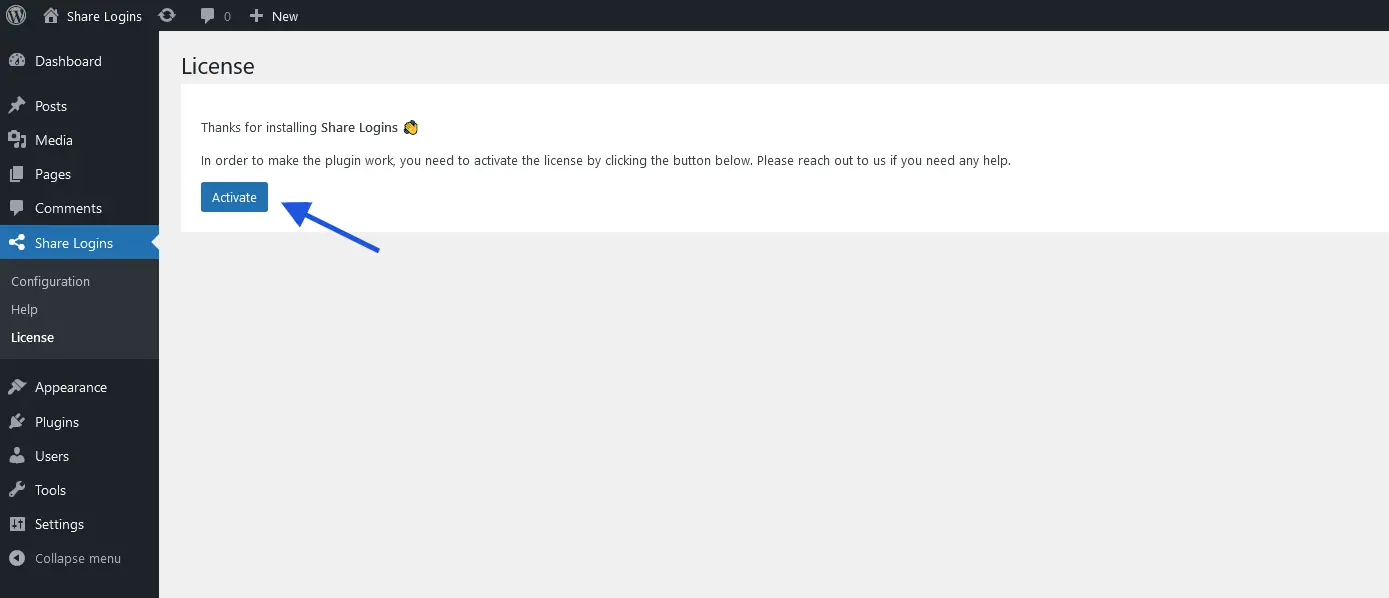
- Activating the license from the Share Logins license section is the first step in getting started. To do this you have to go to your WordPress admin panel. Click on Share Logins then go to the license section. Here you will be able to view and manage the licenses associated with Share Logins. You have to click on the activate button of the license before you can use all the features of Share Logins –
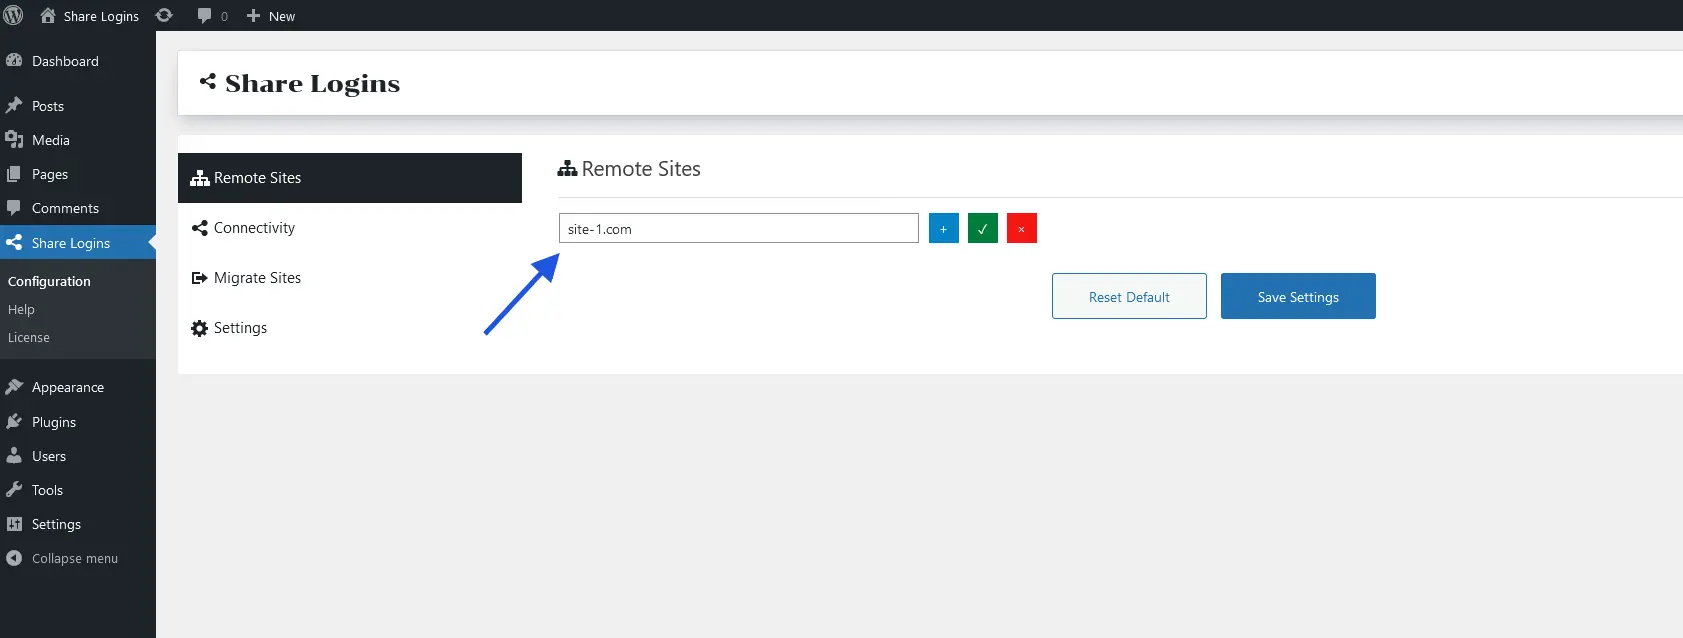
- Next, you need to enter the URL of your remote site into the box (shown in the screenshot) in the plugin settings.
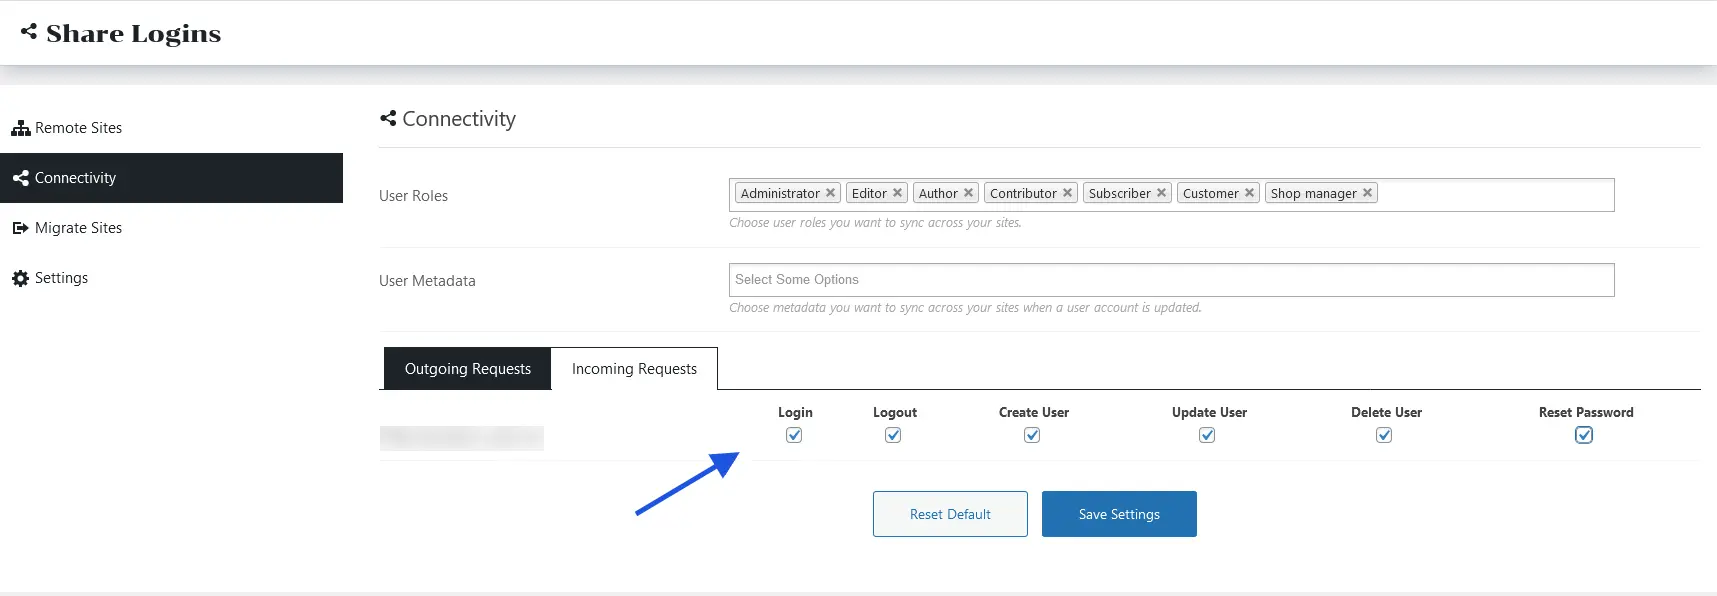
- Now you will need to configure the incoming and outgoing requests as per your preferences.
Incoming & Outgoing Requests
These requests allow you to choose which data you want to share between the websites. You can share logins, registrations, account deletions, and more with Share Logins.
- Save all settings and that’s it! Share Logins and Share Logins Pro should be working correctly.
Save Settings
Other Features #
Connectivity #
The basic settings of Share logins have some cool features. Allow user roles, add custom user meta, outgoing requests, and incoming requests.
Connectivity
Validation #
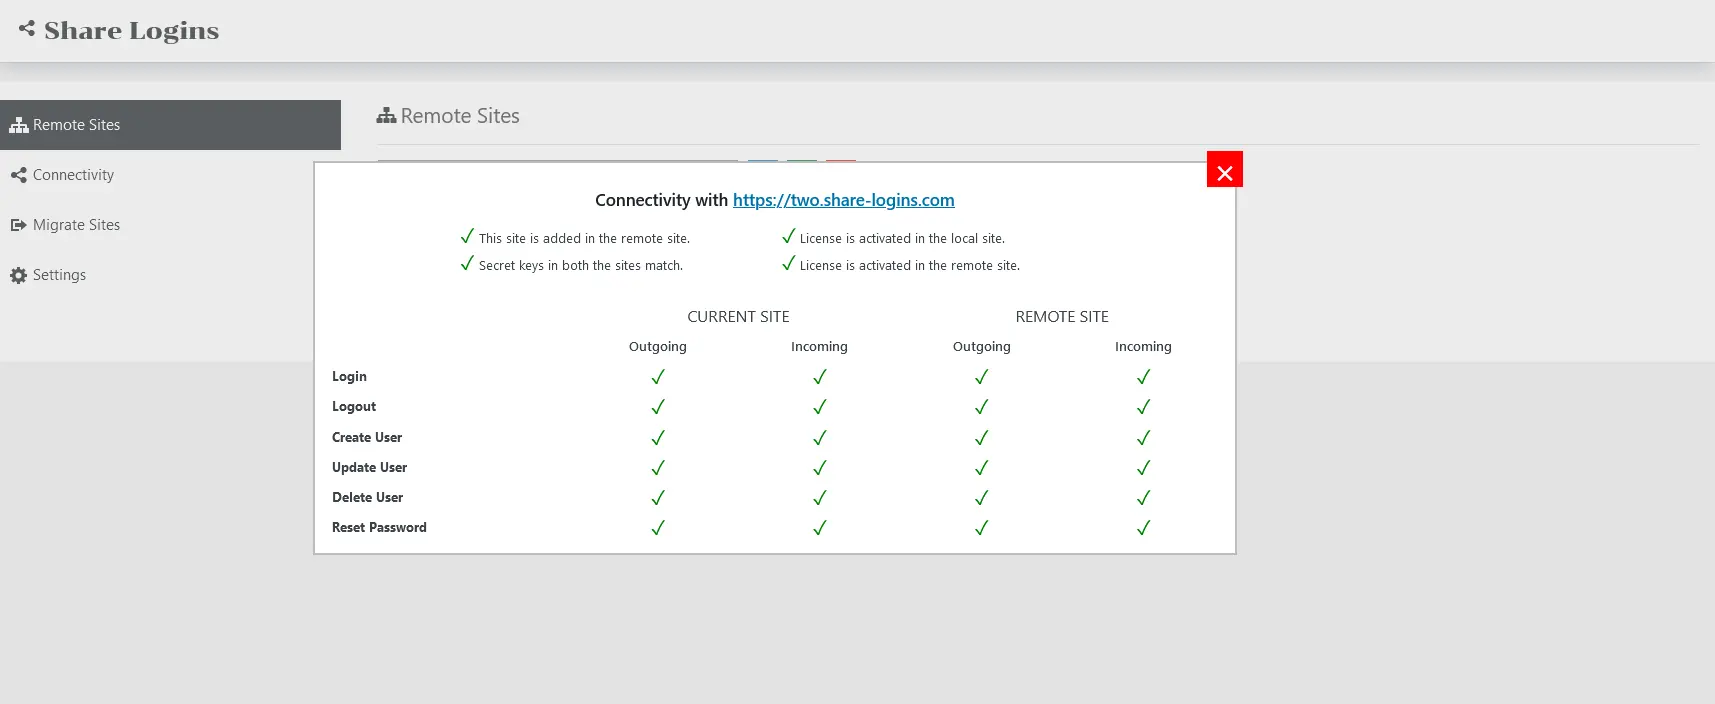
Share logins Pro allows you to validate the connection between the websites. This means if your connection isn’t functional, you will have good diagnostic information to troubleshoot the issue yourself.
For example, if you see that the create user functionality is not sending API requests to the external website from another related website you will see a cross mark in the column of user creation of other sites. That’s how you know that is an issue and you can contact us with an update on this issue. The green sign indicates the settings between the two sites are perfect. Check out the screenshot.
Validation Report
Migrate users #
You will be able to migrate users between your two websites. With this functionality, you can export users from one website and import them to another. That’s how you will be able to keep all users pushed to both websites.
If you had registrations on the individual websites before you installed this plugin, migrating users will ensure that they won’t need to register for new accounts This will ensure all users are on both sites. And also the login, logout, and other features of this plugin will work for them as well as new registrations.
It’s not just a simple “click the button to export” interface. With this feature, you can exclude users, roles, and export metadata. It’s a really powerful function that can be very helpful to multisite owners.
Migrate Users
If you require any assistance feel free to reach out to our support. There is a blue chat box on the site. You can easily reach out to our support.
Was this doc helpful?


