

How to Use the Registration Form Builder
With the Registration Form Builder (available in the Pro version of WC Affiliate), you can fully customize the registration form to meet your specific needs. You can add new fields, remove existing ones, and even rearrange their order, all with an easy drag-and-drop interface.
Follow these simple steps to create and customize your affiliate registration form:
Access the Form Builder
-
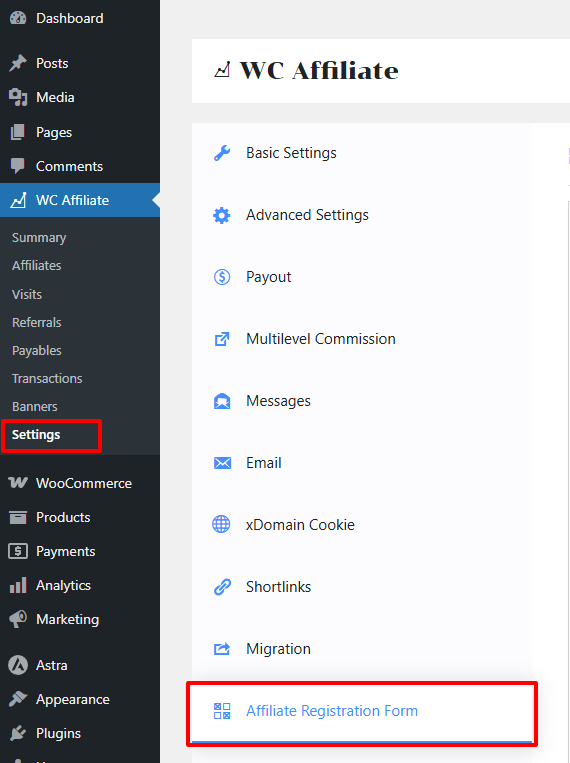
Go to WC Affiliate > Settings.
-
From the list, click on Affiliate Registration Form.
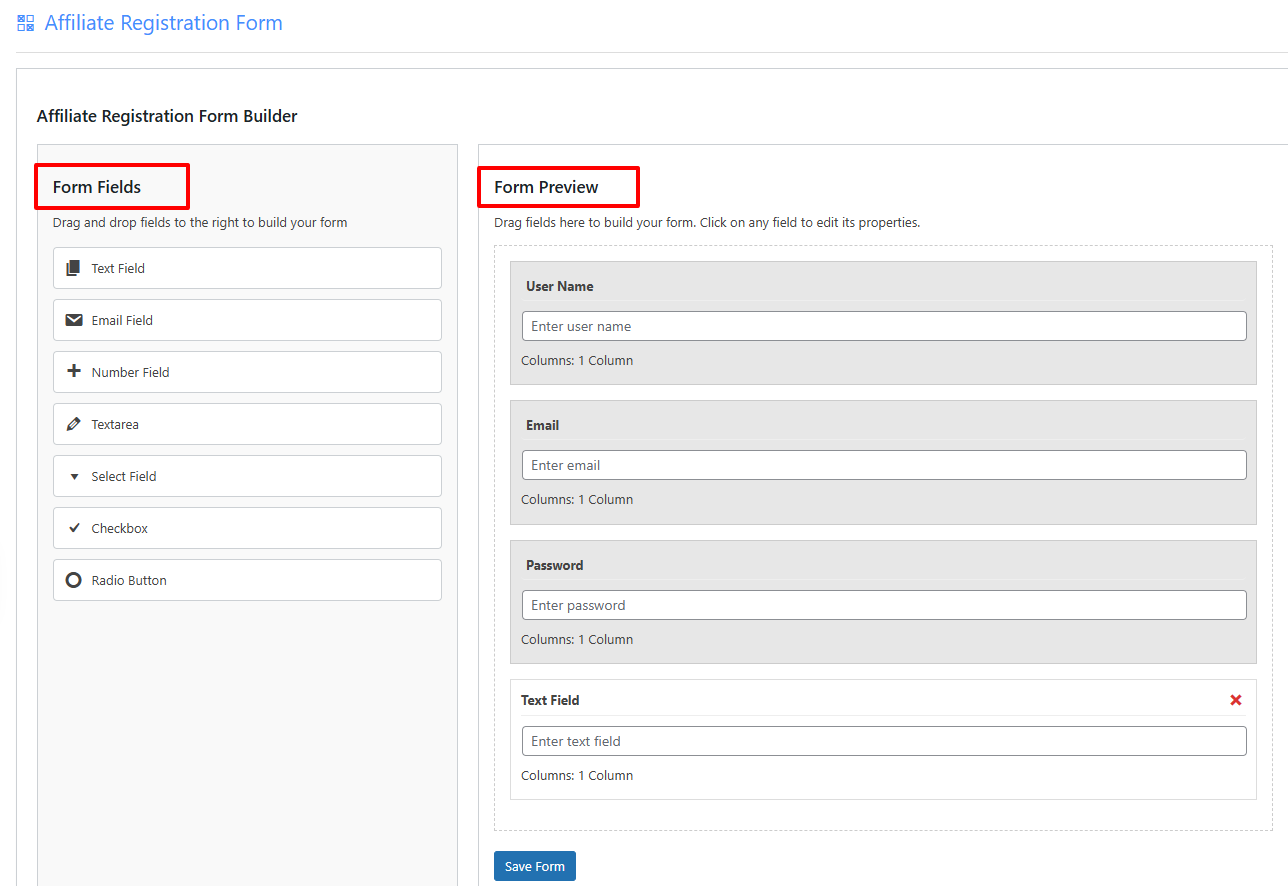
Here, you will see two sections:
-
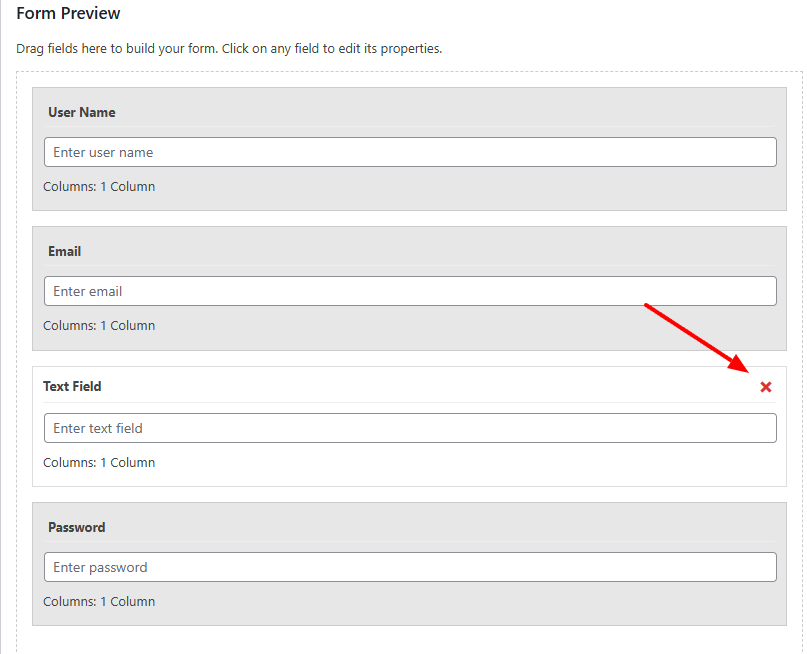
Form Preview – displays the current fields in your registration form.
-
Form Fields – contains the available fields you can add to your form.
Add a New Field
-
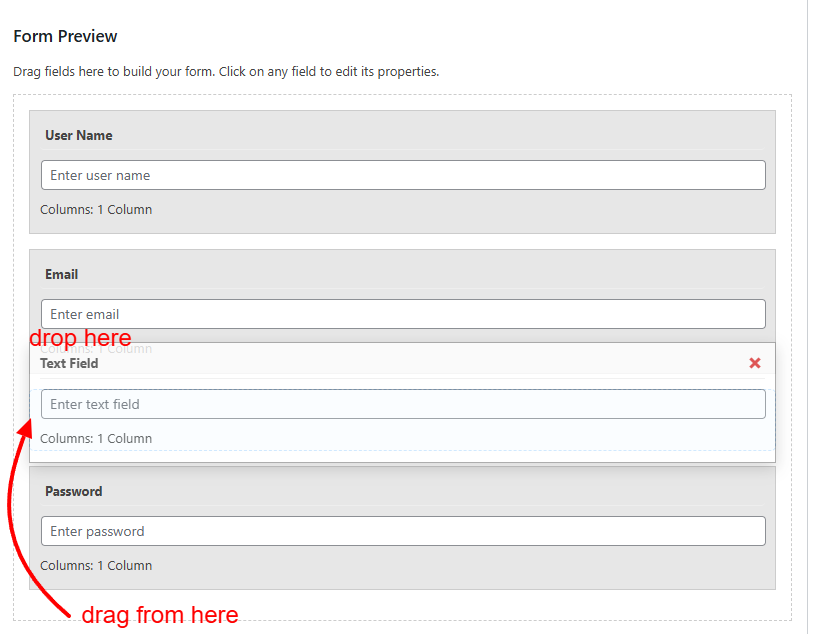
Drag a field from the Form Fields section and drop it into the Form Preview area.
-
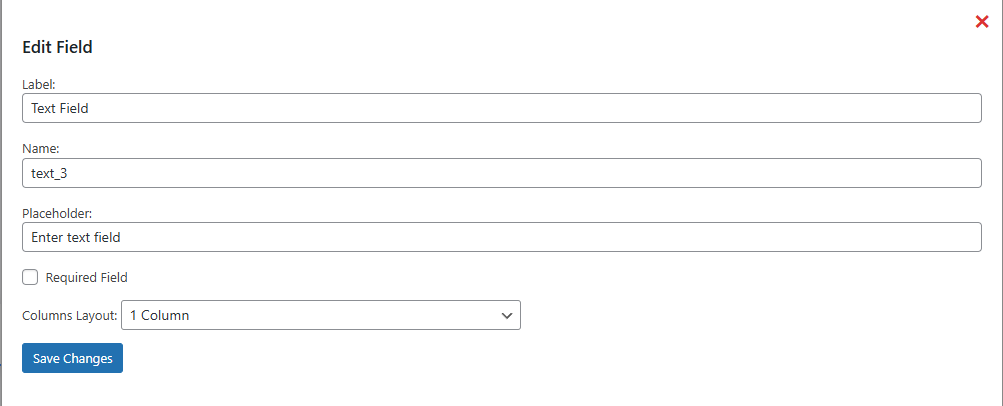
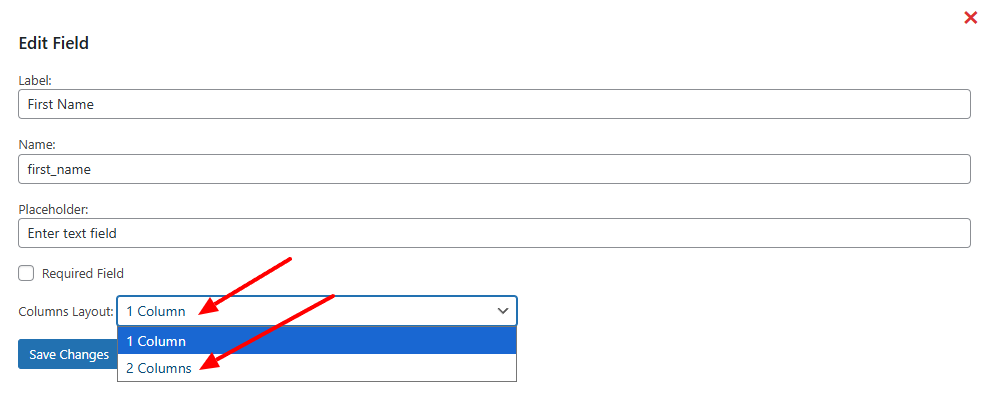
Click on the new field, and a popup will appear with editing options.
-
From here, you can:
-
Change the Label, Name, and Placeholder.
-
Mark the field as Required (optional).
-
-
Click Save Changes once done.
You can add fields such as:
-
Text Field
-
Email Field
-
Number Field
-
Text Area
-
Select Dropdown
-
Checkbox
-
Radio Button
Rearrange Fields
-
To change the order of fields, simply drag and drop them within the Form Preview section.
Remove a Field
-
If you want to remove a field, click on the small X icon next to that field.
Edit Column
You can customize the layout of your registration form by choosing single-column or two-column design.
-
Click on any field in the form.
-
A popup will open with editing options.
-
From here, you can set the field to display in Column 1 or Column 2.
Save Your Form
-
Once you’ve finished customizing, click on Save Form.
-
Your new affiliate registration form is now ready to use!
Was this doc helpful?